The SlumberPod still stands as my favorite baby accessory EVER. I love pulling out my SlumberPod when I’m away from home for the simple reason that my son loves sleeping in it.
Thanks to the SlumberPod, I am able to enjoy traveling again!

Use the DISCOUNT code “UPSIDEDAD” for $20 OFF or click the button below for your EXCLUSIVE discount!
The SlumberPod also made it into my roundup list of the best baby sleep products!
In this updated SlumberPod review, I highlight each of the main features and explain exactly how it can help parents like you get more sleep while on the road with your babies.
I also have some really cool and unique tips to share with you that will help you get the most from your SlumberPod.
What is a SlumberPod sleep tent?
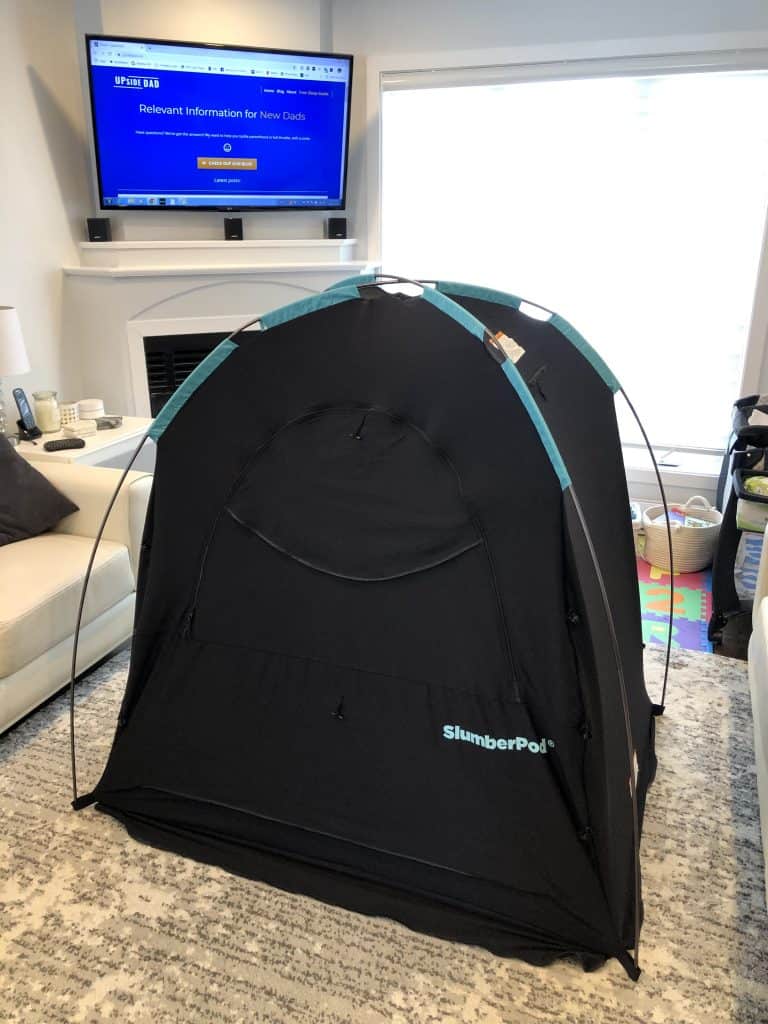
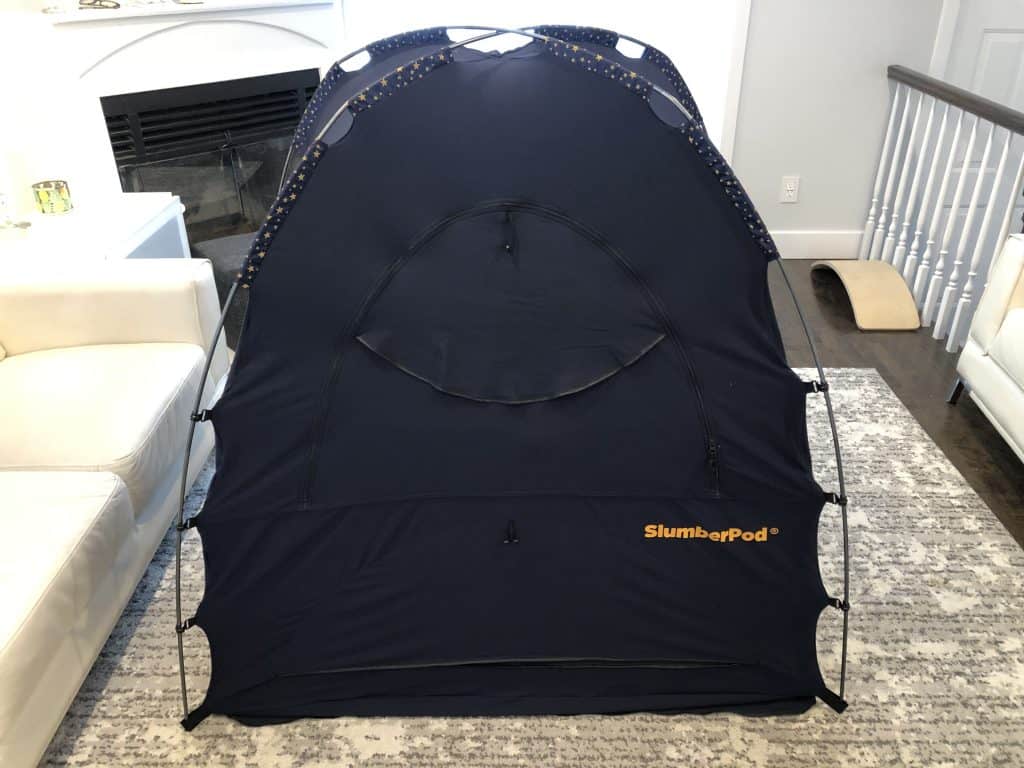
The SlumberPod is an easy to assemble baby sleep tent that goes over your pack n play and helps infants, toddlers (and now even pets) get some much-needed sleep when sharing a room with an adult.
In short, the SlumberPod gives your baby a dark room within your room.

Picture this, baby goes to bed at 7:00 pm but mom and dad don’t have to. You can keep your lights on, walk around and even watch TV while your little one sleeps away in the same room!
What I like the most about having a SlumberPod is that it allows my baby to go to bed while I can still relax and enjoy some baby-free time. It’s also super easy to assemble and fits over most standard travel cribs.
How does the SlumberPod Work?
The SlumberPod helps babies or toddlers sleep better and longer when you’re not at home.
Your kids no longer have to share the same sleeping space as you even if they you are room sharing in a hotel or at the cottage. The Slumberpod gives kids privacy (and darkness) when parents want to keep a tight sleep schedule but may not want to go to bed at the same time as the little ones.

The SlumberPod Fan
The SlumberPod fan is a simple yet useful add-on. Even though the baby sleep tent material is breathable, the air does not move much if the windows are closed and it can feel stuffy on hot days.
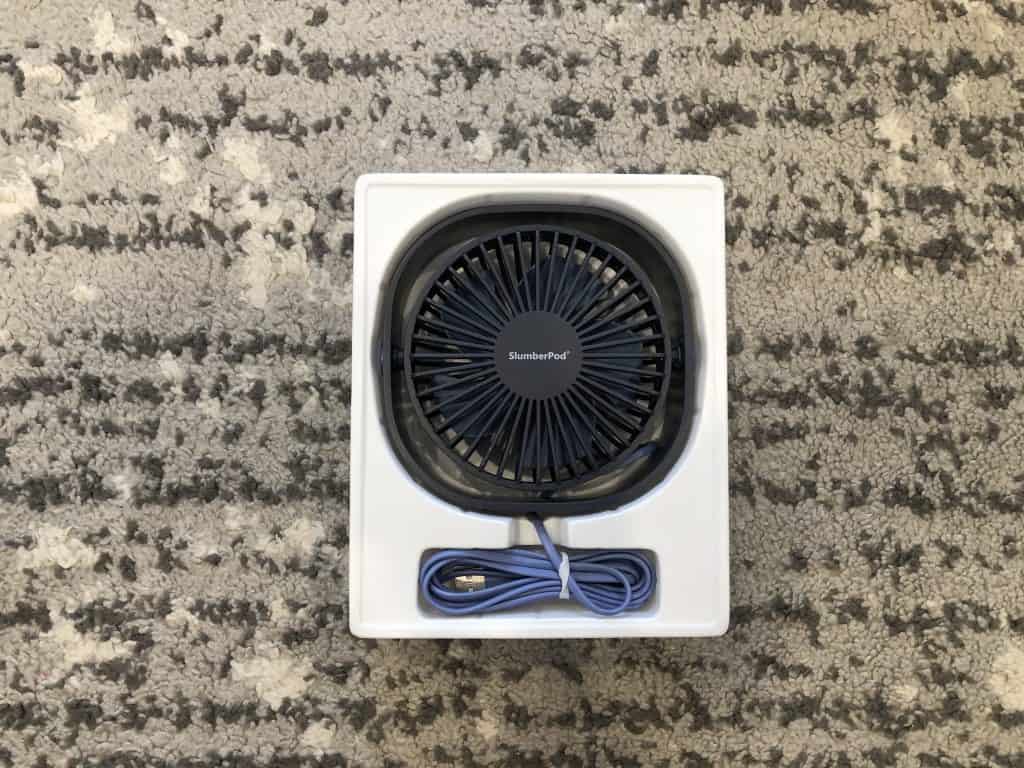
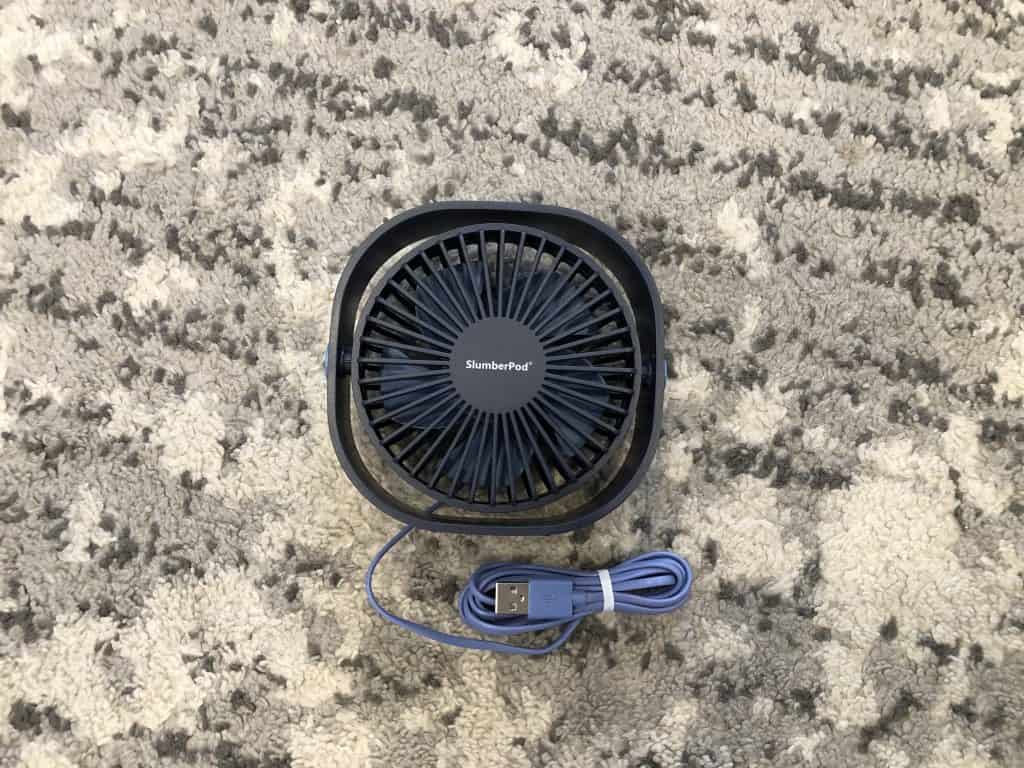
The SlumberPod design team not only added a fan pouch, but they also had the perfect fan made to fit into the side pocket.
The fan works great and moves the air very well. I actually sat inside the pod to feel how it was and I can confirm it works.
How does the SlumberPod compare to other sleep tents?
SlumberPod is really the best sleep tent out there, period. There are many competitors that try to emulate what the SlumberPod does but they don’t come quite close.
In my opinion, the closes competitor is the SnoozeShade but they offer a different product altogether. I even made a detailed comparison of the SlumberPod vs Snoozeshade you want to know more about.
There are a few other alternatives that you can find in my list here. Keep in mind they do not offer what the SlumberPod offers in terms of quality, accessories, options, and especially darkness inside the pod. If you are however looking for a cheaper alternative, they can come in very handy.
SlumberPod FAQ
How big is the SlumberPod?
The SlumberPod measures 50″ Long x 36″ Wide x 56″ High when assembled and it can fit a pack n play that is up to 44” L, 30” W and 36” H.
Does the SlumberPod fit over my playard?
The SlumberPod fits most pack n plays, playards and playpens. Here is a list of some of the most popular play yard models that fit inside the SlumberPod. This list is NOT an all inclusive so there are many other models that will also fit inside the SlumberPod, so make sure to check the dimensions.
- 4moms breeze playard
- Cosco Funsport
- BABYBJORN Travel Crib Light
- Baby Trend Deluxe Nursery Center Play Yard
- Dream On Me Travel Light Play Yard
- Dream On Me Portable Playard
- Evenflo Portable Deluxe Playard
- Graco Pack-n-play
- Graco Travel Lite Crib
- Nuna SENA Aire Travel Crib
- phil&teds Traveller Portable Crib
- Guava Family Lotus Play Yard
- Fisher-Price Ultra-Lite Day and Night Play Yard
- Foundations Essentials Portable Travel Yard
- KidCo Travel Pod Portable Playard
- gb Lufta 3-in-1 Sleeper Play Yard
- Nuna Sena™ Aire
- Costway Foldable Travel Baby Playpen Crib Infant Bassinet Bed
- Safety 1st Happy Space Play Yard
- Ingenuity Smart and Simple Playard – Bryant
You can also fit some mini cribs inside the SlumberPod These include the Delta Children portable crib, and LA Baby The Original Bedside Manor Mini Crib.
SlumberPod is ALSO compatible with many cots and small inflatable mattresses. Make sure to verify the dimensions of you cot and test it out before going on your trip.
Is the SlumberPod safe?
Many parents worry about SlumberPod safety and I’m glad they do. Sleep safety for babies is of the utmost importance and SlumberPod made sure their product was certified to the highest standards. The SlumberPod passes ALL safety tests in the United States, Canada and Europe related to infant and juvenile products.
The SlumberPod is Consumer Product Safety Commission (CPSC) compliant and it even passed other more severe voluntary tests. The mother daughter team at SlumberPod left no stone unturned when it comes to sleep safety your children.
The team at SlumberPod goes into detail about the safety of their product here.
Does the SlumberPod get hot?
In my experience, the SlumberPod can get warm on a hot day if the room is not climate controlled. I have found that opening all of the windows and having the fan on inside the pod will help reduce the temperature significantly.
Slumber Pod now sells their own fan for this exact purpose and the new sleep pod comes with a fan pouch that is accessible from the outside.
Does the SlumberPod fit over a crib?
The SlumberPod does not fit over a standard size crib, but it does fit over a mini-crib and most pack n play, playards and toddler cots.
How to fold the SlumberPod?
It’s really easy to fold the SlumberPod. Simply remove the tent poles, lay the material down on the floor, fold it over itself 2 or 3 times and then roll it up tight. Once rolled up, the whole tent and poles fit into the carry bag.
Does the SlumberPod come with a mattress?
No, the SlumberPod does not come with a mattress, but this is by design. It’s meant to be compatible with many other popular portable mattress brands, including most Graco, 4Moms and BabyBjorn products.
When looking for a travel mattress for the Slumberpod, just ensure it fits their dimensions: (50″ L x 36″ W x 56″ H)
Can the SlumberPod be used for outdoor activities?
The good news is that this versatile sleep solution can indeed be used in various outdoor settings. In this section, we’ll explore how the SlumberPod can be integrated into your outdoor adventures to ensure your little one gets a peaceful sleep.
Adapting to Different Surfaces
The SlumberPod’s design allows for easy setup on a wide range of surfaces, from grass to sand to dirt. The tent’s bottomless feature means that you can place it over a portable crib or play yard, so your baby remains comfortable and protected from the outdoor elements. For additional stability, it’s a good idea to use the included tent stakes.
Providing Shade and Ventilation
Outdoor activities often mean exposure to sun and heat, but the SlumberPod has you covered. The UPF 50+ fabric offers excellent sun protection, keeping your baby cool and safe from harmful rays. Additionally, the mesh ventilation panels ensure proper airflow, so your little one remains comfortable even during warm outdoor outings.
How to setup the SlumberPod in 2 minutes flat
This is not just a Slumberpod review. In this article, I also want to show you how to assemble and use this awesome blackout sleep tent.
The SlumberPod is extremely easy to assemble and even comes with an brief visual assembly manual attached to the carry bag. In my instructions below, I will show with step-by-step pictures a slightly different way that I have been using for months very successfully.
The “User Manual” tag in the carry bag suggests that you lay the SlumberPod material over the playard, whereas in my version I choose to do it flat on the ground. Both ways work just fine and allow for one-person assembly in 2 minutes or less.
Step 1
Remove the 3 items from the bag (1x pod material, 2x tent rods)

Step 2
Lay out the material with the center in the middle and connect the tent rods

Step 3
Pass the rods through the blue slots in the material

Step 4
Insert the ends of one of the rods into the nylon pockets at the bottom corner while keeping the pod flat on the ground. Don’t try to lift the pod yet.


Step 5
Insert one end of the second rod into the nylon pocket and go to the opposite side of the pod

Step 6
While inserting the other end of the second rod, guide the pod upwards and pull the material down as needed
Step 7
Connect the 3 plastic hooks from each side to the tent rods. There are 12 hooks total.


DONE!
At this point you can either set it over the pack n’ play as shown in the video below:
Or you can fold it flat and place it out of the way until bedtime.

The SlumberPod design – convenience and longevity
The simplistic design of the SlumberPod allows for a very quick setup and takedown. The SlumberPod is nothing more than a blackout tent without a bottom.
If you’ve ever gone camping and put up a tent you already know exactly what to do and how to set up the SlumberPod.
I made a video and took pictures of each step to help you get set up in under 2-minutes.
Here is the video of me setting up the SlumberPod in under two minutes.
Pictures and set up instructions are shown in the SlumberPod Assembly section.
Build quality and materials
The SlumberPod is held up with two standard tent poles, but the material of the canopy is what makes it stand out.
The material used for the entire pod is really nice. It’s thick, dark, breathable and it doesn’t wrinkle.
The fabric of the new SlumberPod is exactly the same as the original. It is made from 85% polyester and 15% spandex which makes it breathable and stretchy.
Once you slide the poles into place and attach all of the hooks, you can feel the SlumberPod becomes very taut and sturdy.
The fact that the blackout tent is light and bottomless makes it super easy to move around without feeling like it’s going to fall apart.
The whole pod can be easily stuffed back into the carry case with the poles and all. Once in the carry case, it can fit in a standard carry-on luggage or backpack.
The windows
Another amazing feature of the SlumberPod design is the multiple “windows”: two in the front and two in the back.
The window design has changed slightly in the new SlumberPod. The new setup has changed the rear windows and kept the same design for the front windows.
The front windows have the same dark material under the canopy that helps keep most of the light out even when the window is open.
The front windows open the same way as before (see images below).The upper window is height adjustable but the lower one only has one fully open setting.


The rear windows have changed. What used to be a thin mesh can now be better described as netting. Because of this, SlumberPod changed the “open” setting of the new windows.


The way to open the rear windows now is with a small post that holds the material away from the window to allow for airflow without letting the light in. A clever way to have the windows “open” while maintaining the blackout darkness that SlumberPod is known for.


The addition of the fan pocket in combination with the new windows means that airflow is much improved inside the sleep tent.
I can personally attest that the windows significantly increase the airflow inside the SlumberPod. I tested and witnessed with my own eyes what the open windows can do. The temperature inside the baby sleep pod dropped from 75F to 70F (24C to 21C) after the windows were opened.
Bottom line: the windows work!
The camera pocket
The one piece of the SlumberPod design I didn’t love in the original version was the camera pouch. The plastic material that they used in the camera pouch was thick and distorted the image to a point that it made it very difficult to see the baby in the dark. This was the case for many different baby monitors including mine.


The other (minor) problem was that the pouch was fully enclosed in plastic. This means if your camera had a temperature sensor it would not ready the real temperature inside the pod but the temperature inside the camera pouch and they could differ significantly.
The updated SlumberPod attempted to fix these two issues. First, they added a mesh material to the sides of the pouch to allow for airflow and therefore an accurate temperature reading.

Secondly, they made the plastic material slightly thinner and more malleable which helps with the camera image and the infrared beam for night vision.
The new fan pocket
This new feature is a huge bonus for me. One of my favorite tips for parents using the original slumber pod was to bring a portable fan and place it on the ground beside the playard to get the air moving inside the pod.

Since the addition of the fan pocket, you can simply place your fan inside the pocket from the outside of the pod. It works like a charm.

SlumberPod has added an easy access fan pocket on the side that fits most small portable fans. They also decided to come out with their own fan that fits perfectly in the pocket – great job again!
SlumberPod tips that will enhance your experience
I consider myself a SlumberPod expert because I’ve been using it for well over two years, with two of my kids, on multiple trips, weekend getaways, and naps at grandmas. I’ve set up and taken down the SlumberPod dozens of times and I don’t get tired of it.
I was using the SlumberPod way before they went on Shark Tank and got a deal from Barbara – ok, enough bragging.
Because I’ve used the baby sleep pod in almost every possible situation, I figured out some trick to make it even better.
Here are some tips I want to share with you that will most definitely enhance your SlumberPod experience:
Please note that I crossed out my original tips that are no longer applicable to the new SlumberPod but still left the text for reference in case you are looking at a second-hand SlumberPod.
- Bring a small portable fan
- I realized that even though the SlumberPod canopy is breathable, the air can get a bit stale inside, especially on hot days. Since I love moving air and always have a fan going in my room, I figured my son must love it too. For this reason I always bring a small portable fan. The new SlumberPod design has a fan pocket that is accessible from the outside and they also offer their own fan that fits perfectly in the pouch.
- Bring a sound machine (or anything to play white noise)
- When you share a room with your baby or infant you may want to go about your night after he goes to bed. I found that a sound machine playing white noise helps create a sound barrier between the pod and the outside world so you can walk around, watch TV or play on your phone with the volume up while your baby sleeps away in the same room.
- Setup video monitoring
- I like to see my baby when he’s sleeping and I know many parents feel the same way. The SlumberPod has a camera pocket that works very well with most baby monitors.
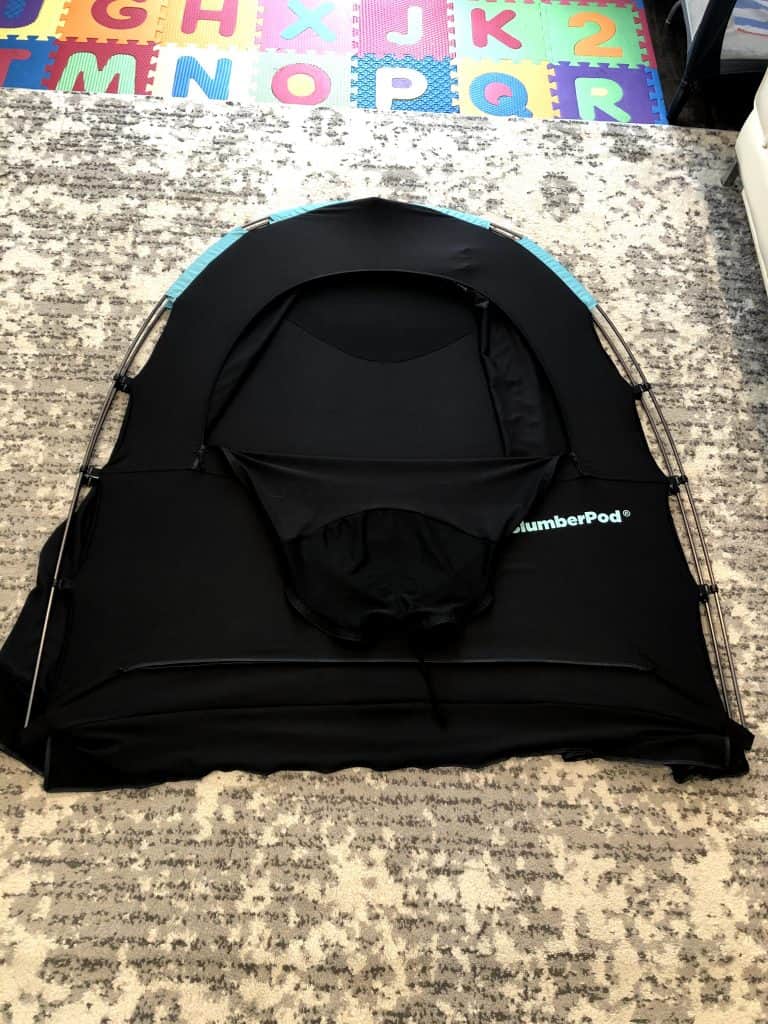
- Fold it flat
- The slumber pod can take some space when open, especially if you are sharing a small hotel room with your infant baby. If you push the two poles towards each other from the side, the SlumberPod actually folds flat to less than an inch thick while still set up! So, it can be placed right behind the pack n play or against any wall in the room and it takes so much less space.
- Air it out after a trip to tropical (hot and humid) destinations
- A few days after I returned from a two-week vacation in Mexico (where my 8 month old slept through every single night and many naps in his SlumberPod) I decided to open up the SlumberPod and found an odd, musty smell coming from it. I then confirmed that my brother-in-law also had the same issue. I can only assume that the humidity from the Mexican heat got in the material and stayed there even though our rooms were air conditioned. Bottom line is that all you need to do is air it out once you get home.
- Bring it everywhere
- I now bring my SlumberPod everywhere I go. It might as well stay in the trunk of my car permanently. Let’s say you go to grandma’s to hang out for a while? Pop the pod open and put baby to nap when it’s time. It literally takes 2 minutes to setup and take down and will certainly help them sleep better.
Use the DISCOUNT code “UPSIDEDAD” for $20 OFF or click the button below for your EXCLUSIVE discount!

Paul is a passionate dad who founded Upside Dad to share his parenting journey with other new parents. He graduated from Concordia University and worked as a test engineer for over a decade. Paul loves dad jokes and craft beer.
Learn more about Paul and Upside Dad here.