Before we had our son, one of my favorite parts of the work week was getting home from a long day and heading straight downstairs to my garage gym to do my daily workout. I turned the music up and spent the next hour fully disconnected from everything else.
Then life changed. We had our wonderful son and spare time somehow just ceased to exist. Every evening, I walk into the house after work and just as the cliché goes, I’m handed over the baby by a tired mom; “Your turn”.
Heck, mom just spent the entire day with the little guy and I know how much of a handful he can be. So, deservingly it’s my turn to take over.
Working out is one of my passions as well as my form of therapy. After a good workout I feel relaxed and accomplished. So, I needed to figure out a way to still get my workout in and care for the baby at the same time.
When baby was happy lying in a bassinet it wasn’t too difficult, but those days go by quickly. Eventually, the little guy needs more entertainment and attention and it becomes almost impossible to do anything unless you’re holding him. That’s when babywearing came in and saved my workouts.
My fitness journey
Over 11 years ago I fell in love with Crossfit, weightlifting and functional fitness; and I never looked back. I quickly got certified and continued to learn as much as I could about fitness. Since then I have been working out and coaching individuals and groups in functional fitness workouts. I love it!
Once my son got to about 4 months of age he no longer liked being left on the floor or in a bassinet for more than a minute or two. He needed some entertainment. The only way he would remain happy and not cry was to be held. That’s when I decided to start exercising while babywearing!
I looked around the web and didn’t find too much info on the types of exercises I liked doing so after exploring and trying so many different types of workouts, I decided to put together my own guide to help other new parents.
Why workout with a baby carrier?
Because it’s a win-win. Most babies love being in the baby carrier, even better, they love moving around while in the carrier.
Don’t be fooled, not all babies will love the carrier at first but given some persistent trying and sometimes just time, they grow to love it. Not only are babies comfortable in the carrier but it allows them to see the world from a different perspective while moving around and not getting bored.
Mom and dad get their workout in and baby is entertained; win-win.
It’s not always easy to workout with the extra weight of the baby and the feeling of being pulled forward but let me tell you, it’s not only possible to do it safely and get a great workout but it’s also really fun for everyone involved!
Related posts: See a list of other activities you can do while babywearing as well as how long you can carry a baby in a carrier.
The best babywearing exercises
Ok, so there is a good chance that you’re now ready to start exercising while babywearing but you’re still not sure which exercises you can or should actually do. There are many babywearing exercises available to keep your daily workouts fun and varied and I’ll go over a bunch of them in detail below.
For each of the exercises, we will look at the movement itself, pointers for proper technique and tips for how to perform each movement while babywearing.
Don’t worry if the exercise name scares you, there are always modifications that can be done to each of them to make them accessible to everyone. I’ll also explain how you can scale it to you level and still get the stimulus you are looking for.
Let’s take a look at some of my favorite babywearing exercises!
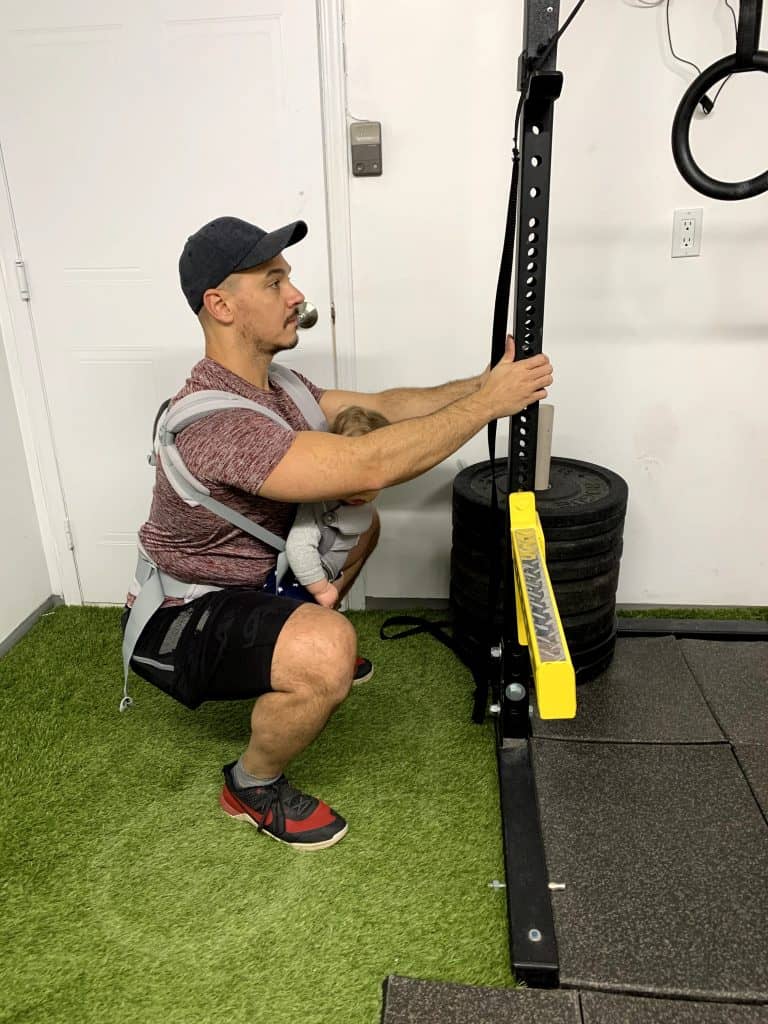
The babywearing squat
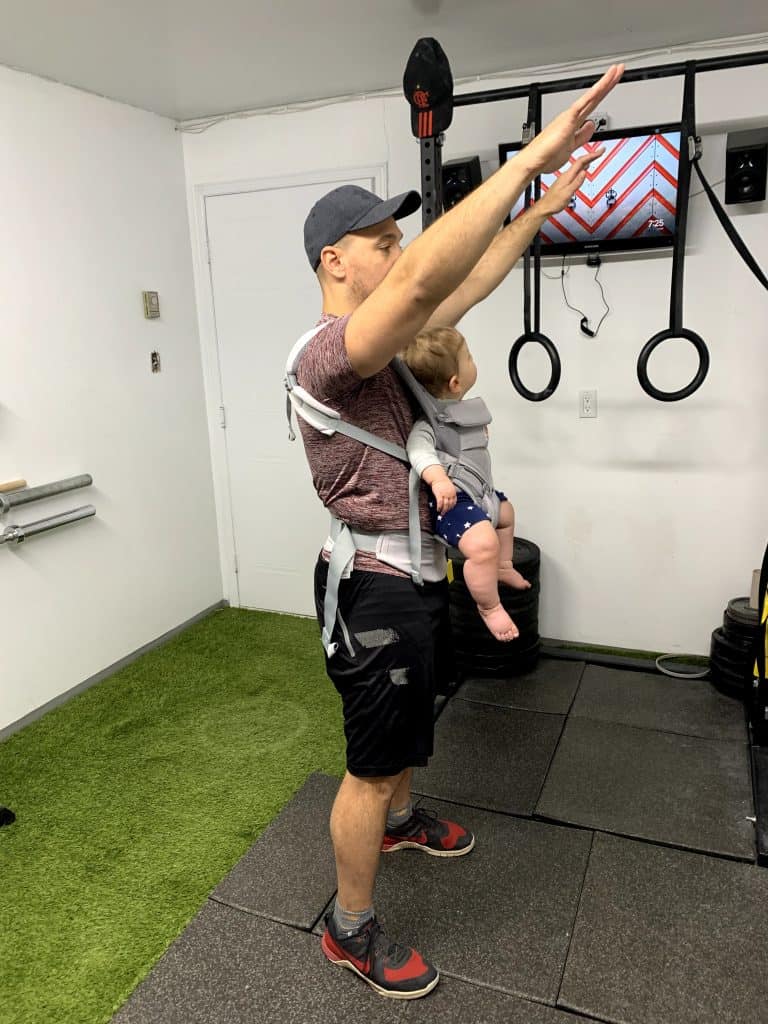
This is the simplest yet still the most effective exercise out there. The squat is not just a “leg” exercise, it’s an almost full-body exercise that will challenge you in many different aspects such as strength, flexibility and even cardio. It will target not only your legs but also your core, posterior chain and even your back and shoulders (especially when babywearing).
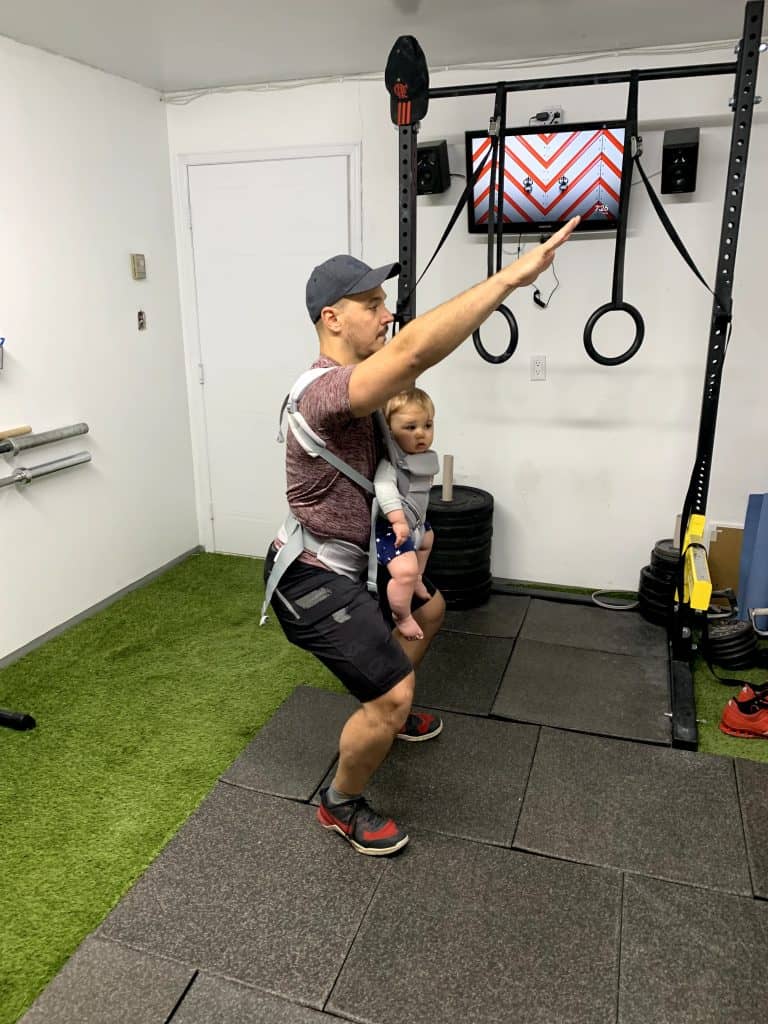
The squat technique
With your feet approximately shoulder width apart you will want to start bending your knees while pushing them away from each other. As you go down you want your torso to remain as upright as possible while engaging your hamstrings throughout the whole movement.
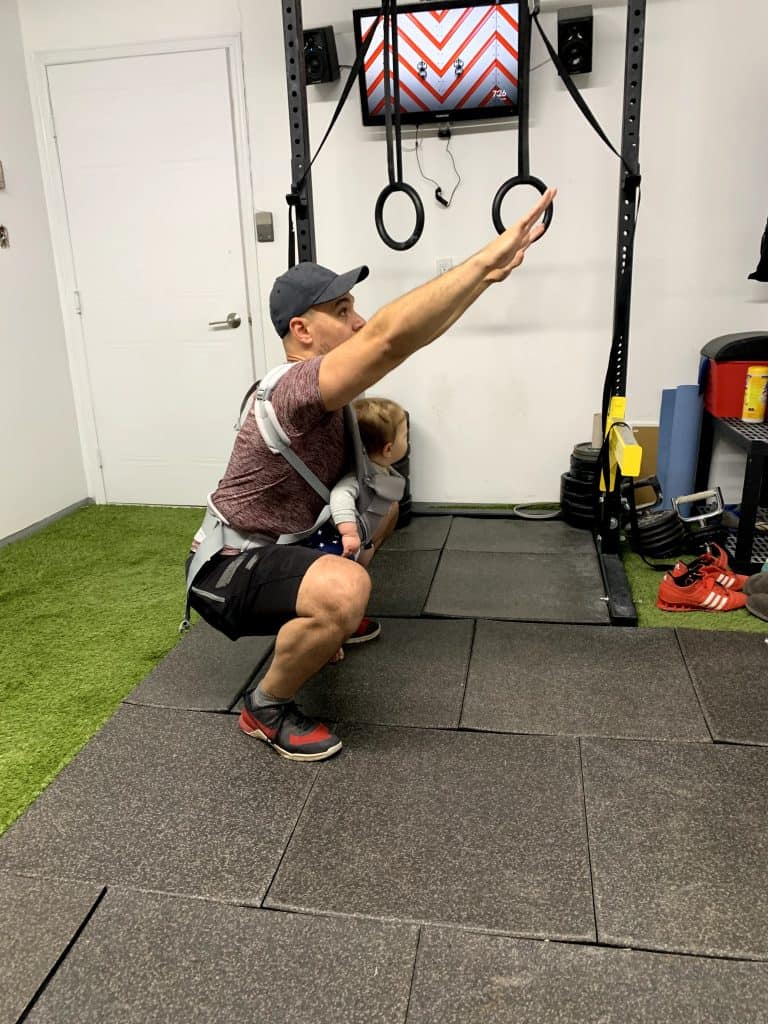
The goal is to go as low as possible while maintaining good form and always keep pressure on your heels ensuring they don’t come off the ground.
As you stand yourself back up, push through the heels while keeping your gaze high and still engaging your core.
Babywearing tips for the squat
If you have never squatted with a baby carrier make sure to try it out in a safe manner first. Use some sort of a fixed structure for support as you try it a few times while really paying attention to how it feels to have the extra weight of the baby on you.
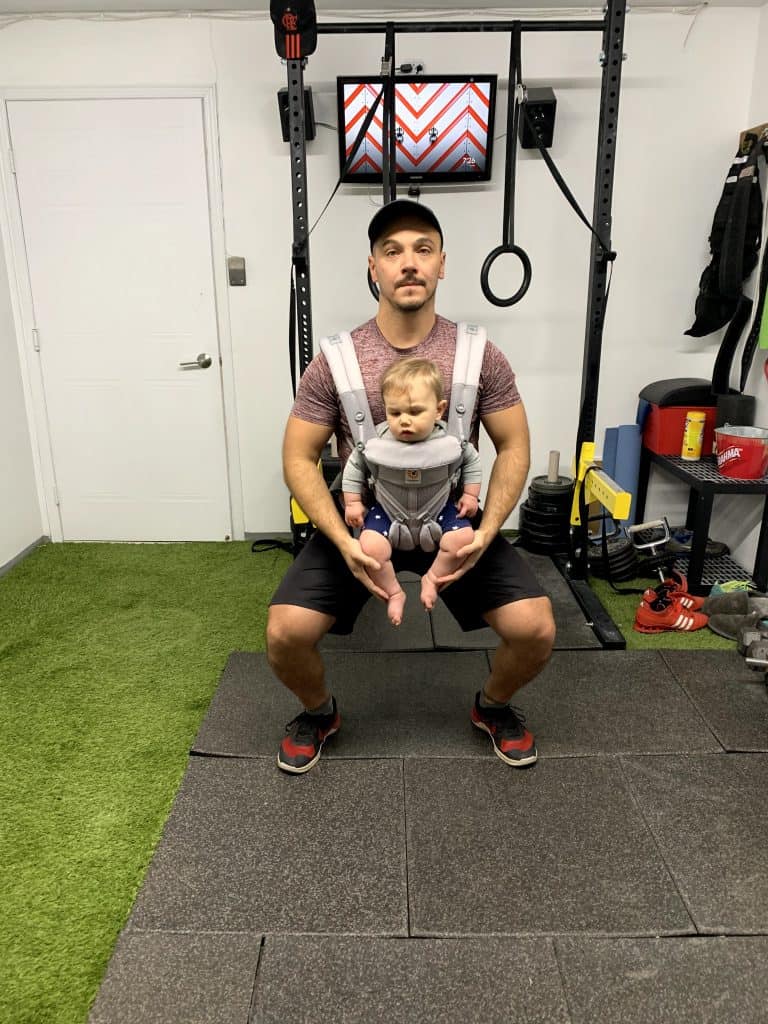
I suggest using a door, post or even just the corner of a wall to support yourself as you go down and back up.
As you move through the range of motion, you want to make sure your baby’s legs and arms are always free to move. I found that feeling the baby’s legs and keeping them tucked in helped keep them away from getting stuck on my thighs and being push up as I went down.
Scaling down the squat for babywearing
The best way to scale or modify the squat is by shortening the range of motion or using a support to assist for balance and strength as needed
For range of motion, if you’re not comfortable going too low on the squat, you can use a box, chair or couch as a squatting target. Do NOT sit down and relax your muscles as you reach your target in between reps. Instead, touch the target and come right back up. The target is there in case you need to bail or are unable to stand, so you have a safe spot to stop and rest.
For support I suggest using a post or rings to hold onto as you go down and assist only as needed as you stand up. Try to still keep it challenging.
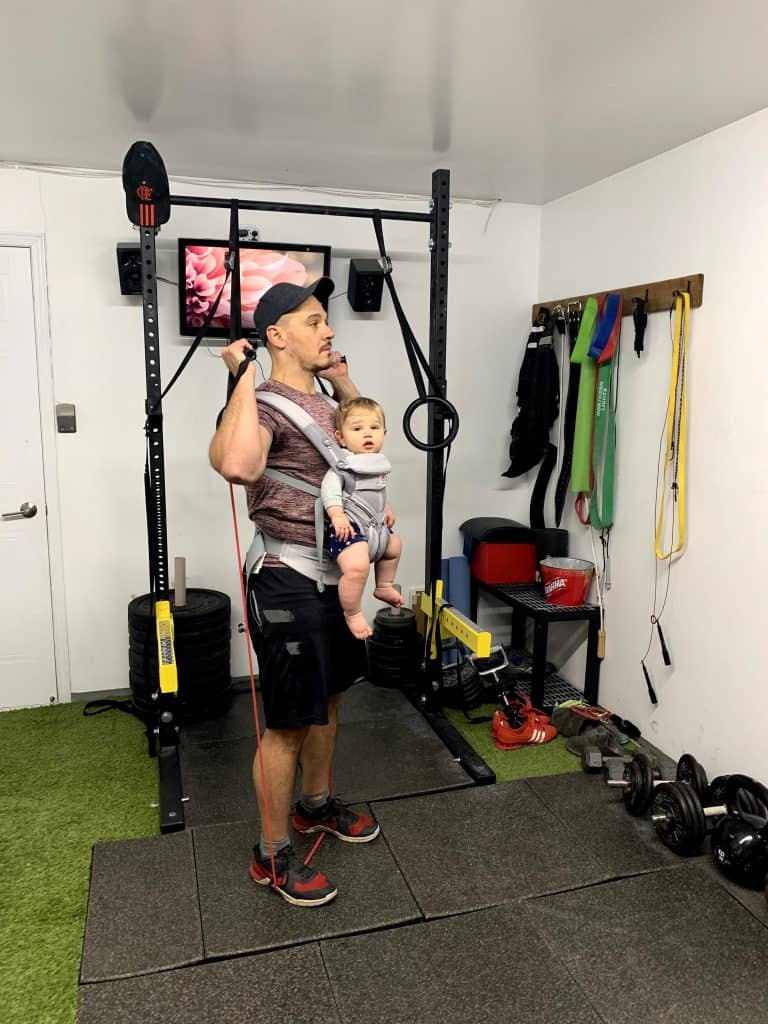
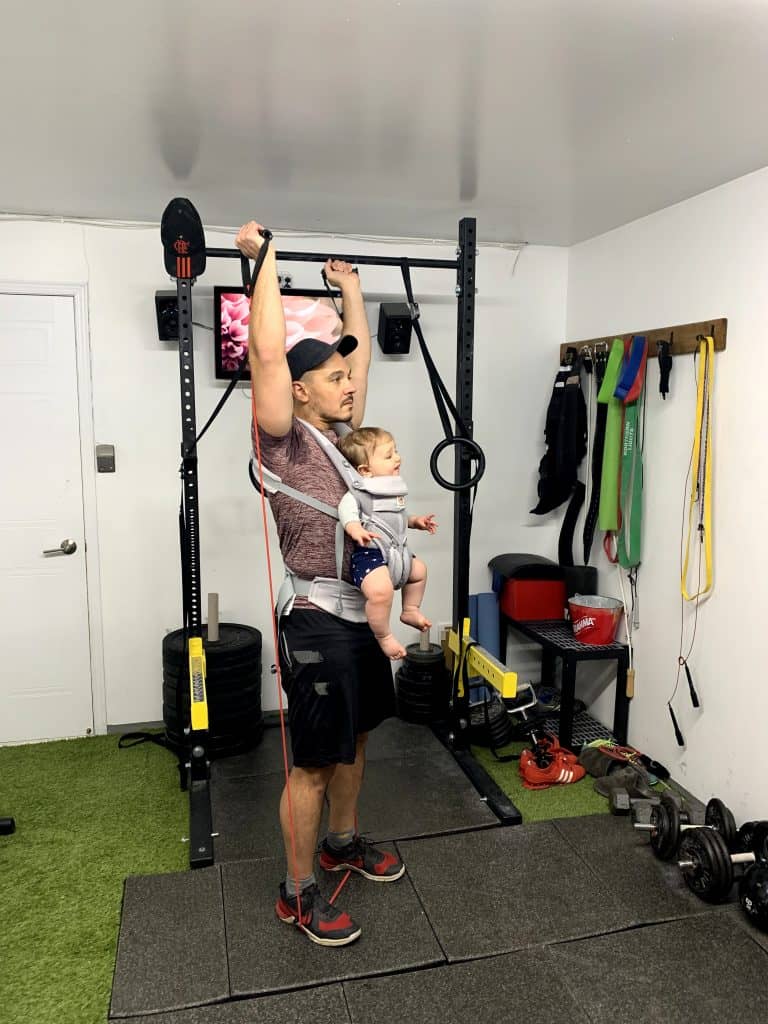
The babywearing pull up

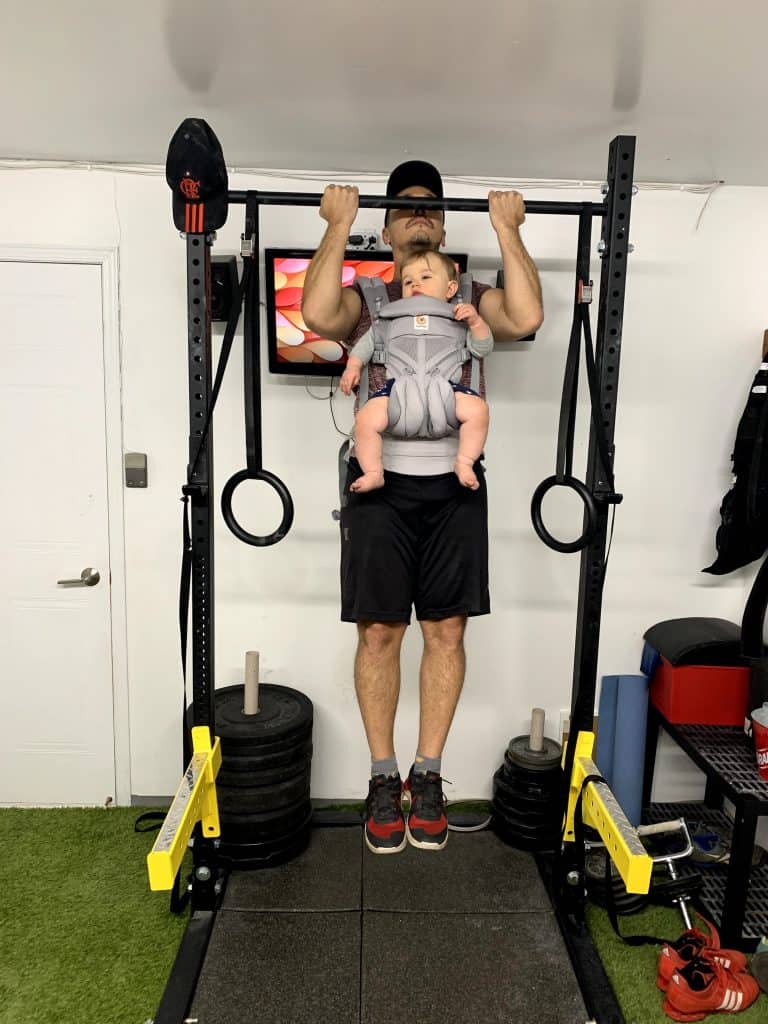
Many fitness experts call the pull up the “upper body version of the squat” because it’s one of the most effective and complex upper body exercises someone can do. Not everyone can do a pull up and even less people can do it while babywearing. But worry not, because everyone can get the same stimulus by correctly modifying the movement to their level. Read on to find out more.
Pull up technique
Before starting a pull up (or any scaling option) you should have your entire core, back and shoulder engaged. You do not want to be in a “passive” hang position. Instead you want to be actively engaged.
You can have you palms facing away from you (pull up), towards you (chin up) or you can alternate between the two positions to get the best of both worlds.
Babywearing tips for the pull up
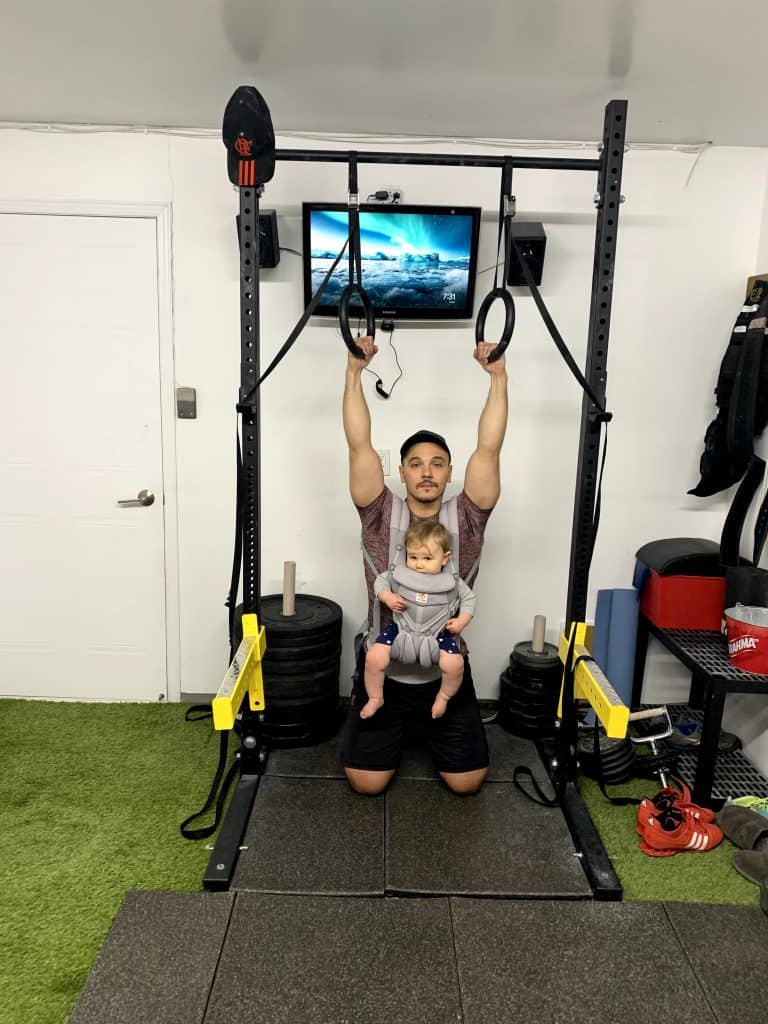
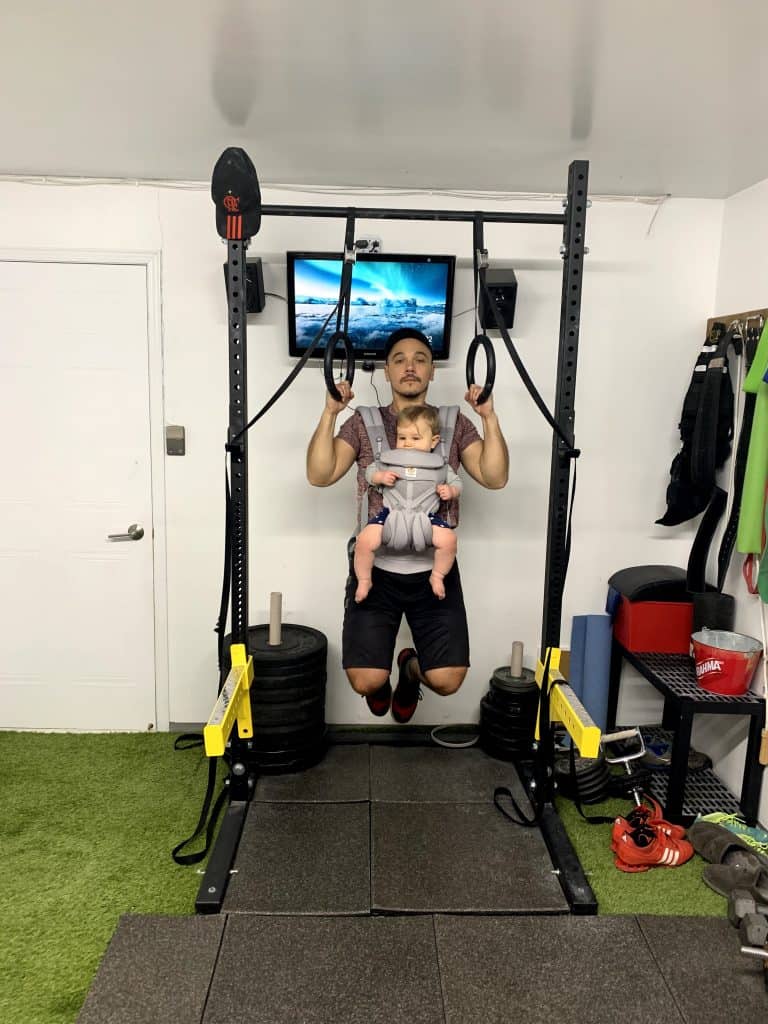
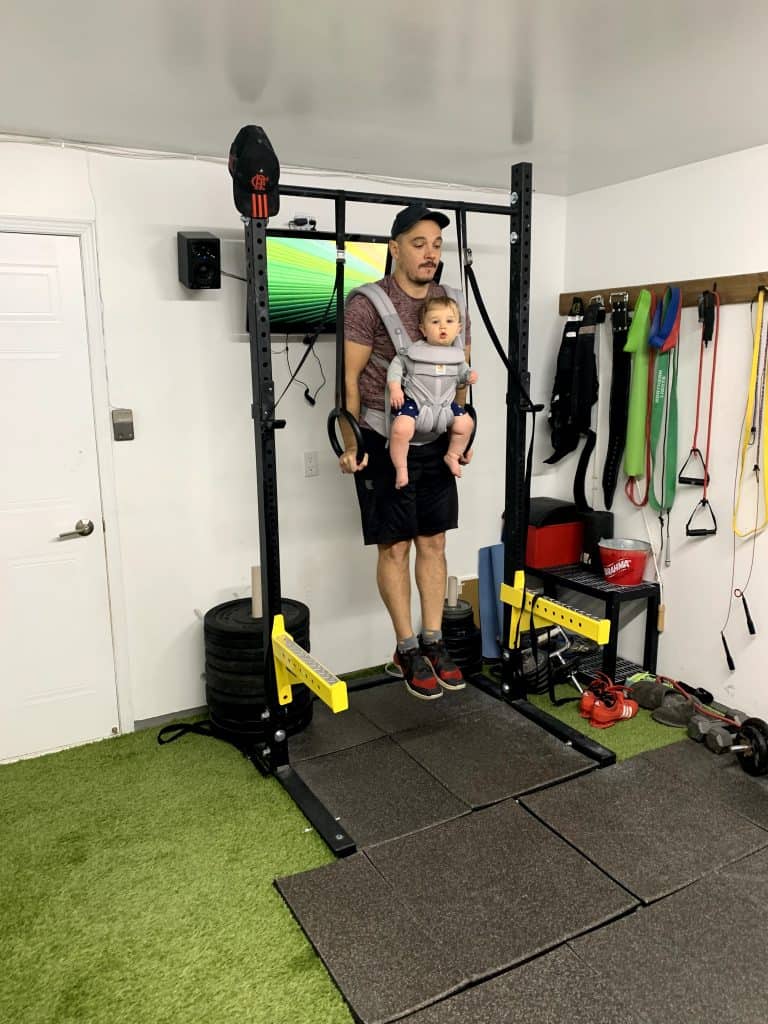
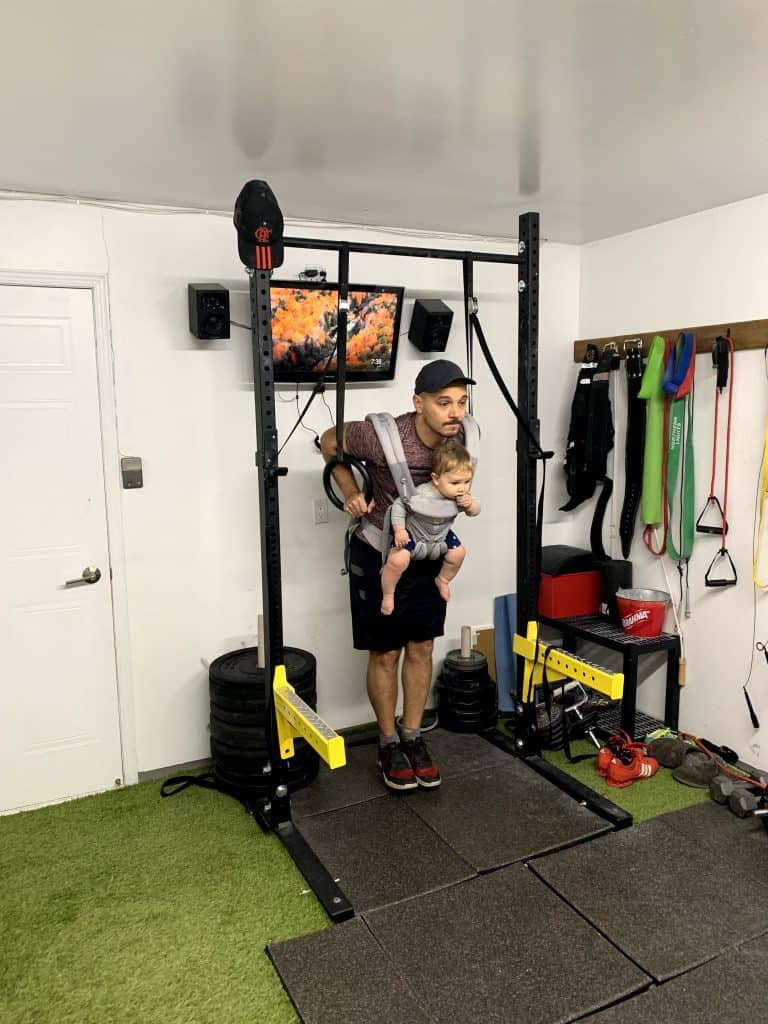
For babywearing purposes, I like to use the rings (or a TRX system) for pull ups for two reasons:
- They are height adjustable and allow you to stay as close to the ground as you feel comfortable. So, you don’t need to worry about dropping from height in case you need to bail out of a rep quickly.
- They allow you to go for full range of motion without worrying about having a bar on the way of the baby’s head.
Scaling down the pull up for babywearing
If you can’t do a pull up without your baby in the carrier, it is not advised to try it while babywearing.
One usual scaling option got the pull up is to use elastics stretched down to your feet to aid the pull up. However, I would not recommend this modification while babywearing because of the difficulties in pulling the elastic to your feet and then removing it safely. There is some risk of getting stuck and even falling so stay away from using elastics.
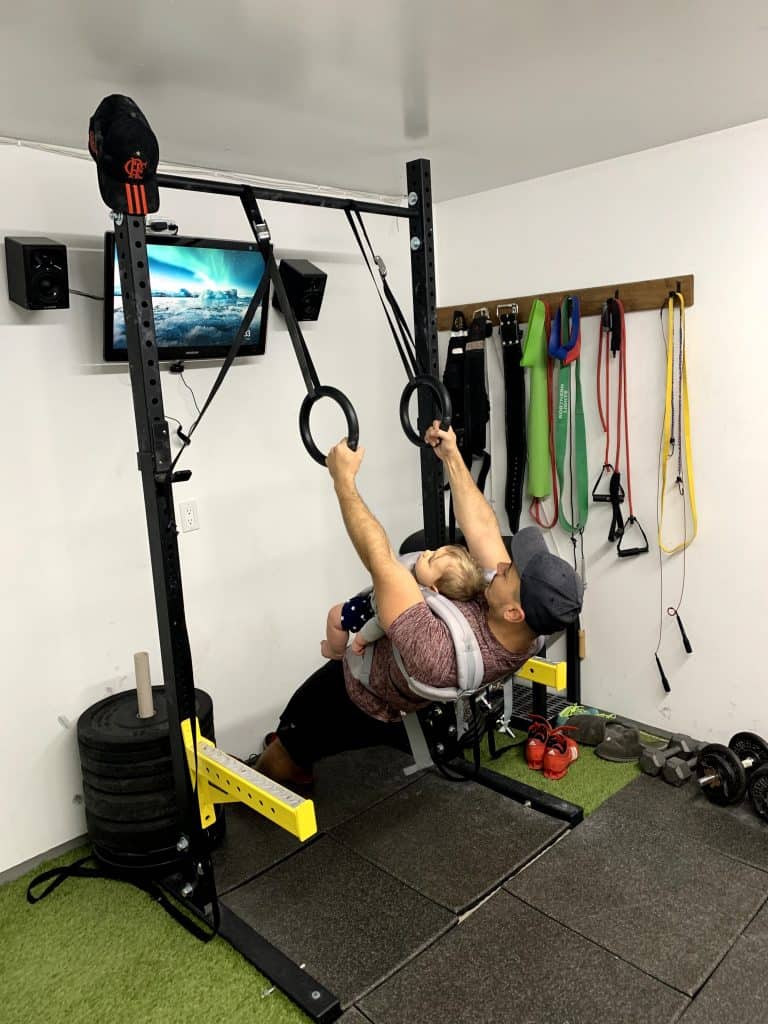
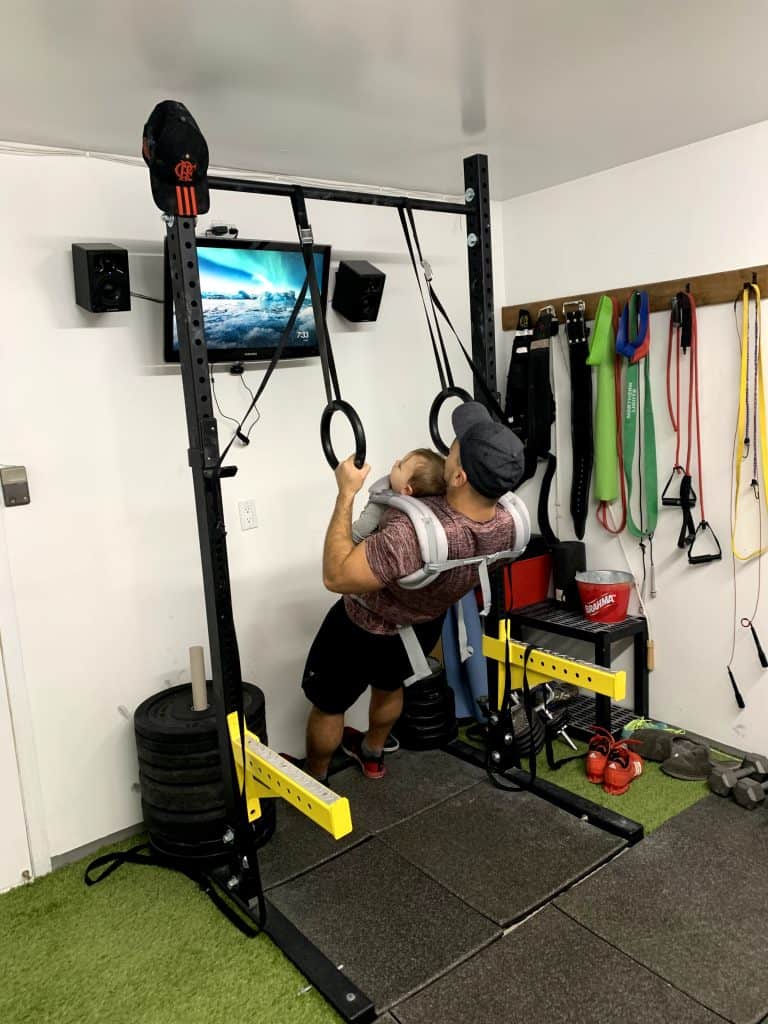
The best option for scaling the pull up while babywearing would be a ring row or bar row. If you have access to a low pull up bar you can use that but the rings are still the best option. The rings allow you to go full range even with the baby attached to your front side.
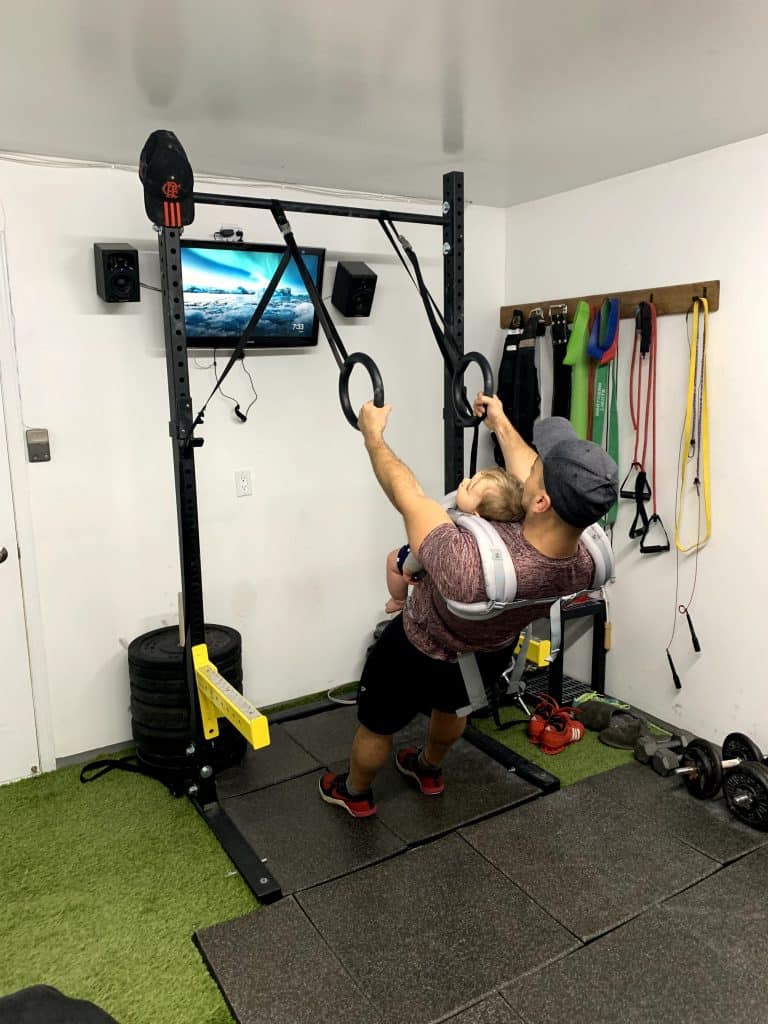
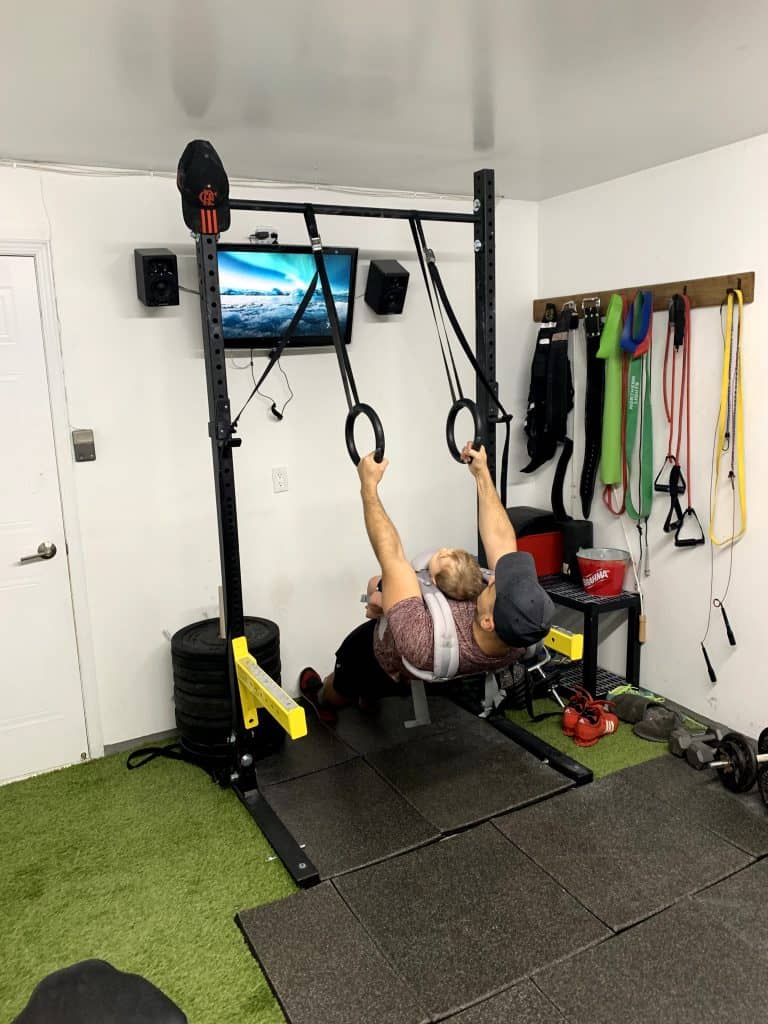
Adjusting the position of your feet allows you to make easier or more challenging. The more horizontal your body, the harder it will be to perform the row. Always keep your core very tight and don’t allow your body to bend due to the weight of the baby.
The babywearing lunge
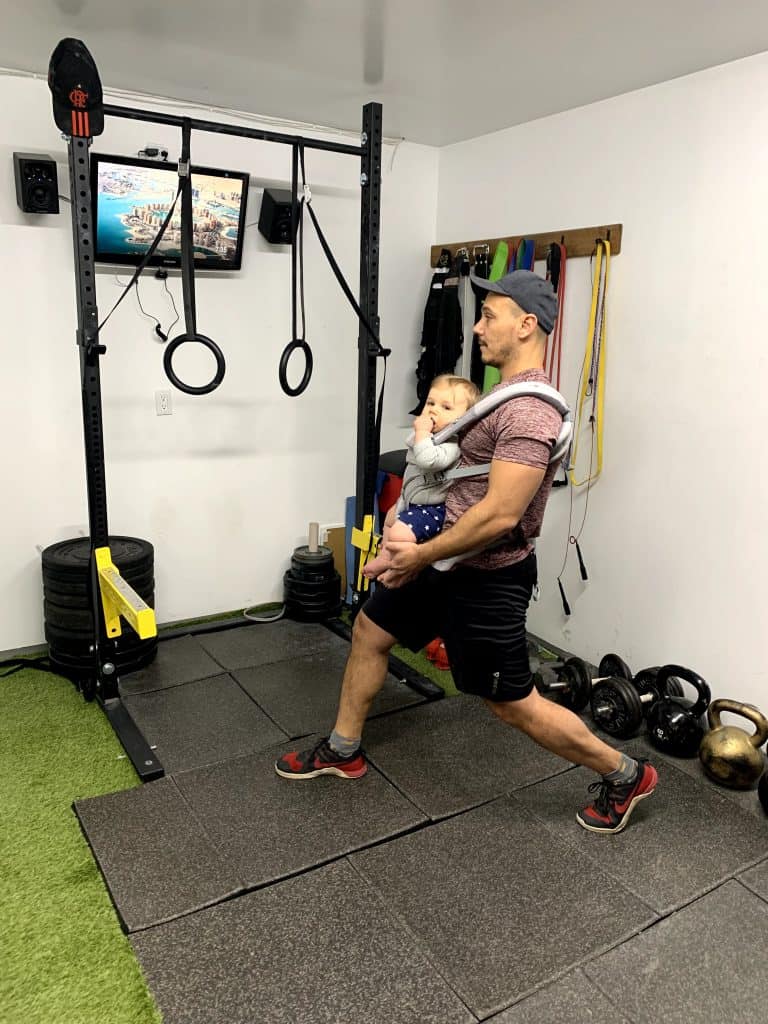
The lunge is a simple and effective exercise that can be performed safely while babywearing. A regular forward lunge is performed by taking big step forward and bending the trailing knee until it touches the ground.
Things change slightly while babywearing because the weight of the baby will pull you forward slightly potentially pulling you out of balance.
Lunges can normally also be performed by moving the rear foot backwards first (backward lunge) or by continually moving forward (walking lunge). The backward lunge is not ideal for babywearing because of the potential for loos of balance. I would suggest to always lunge forward when babywearing.
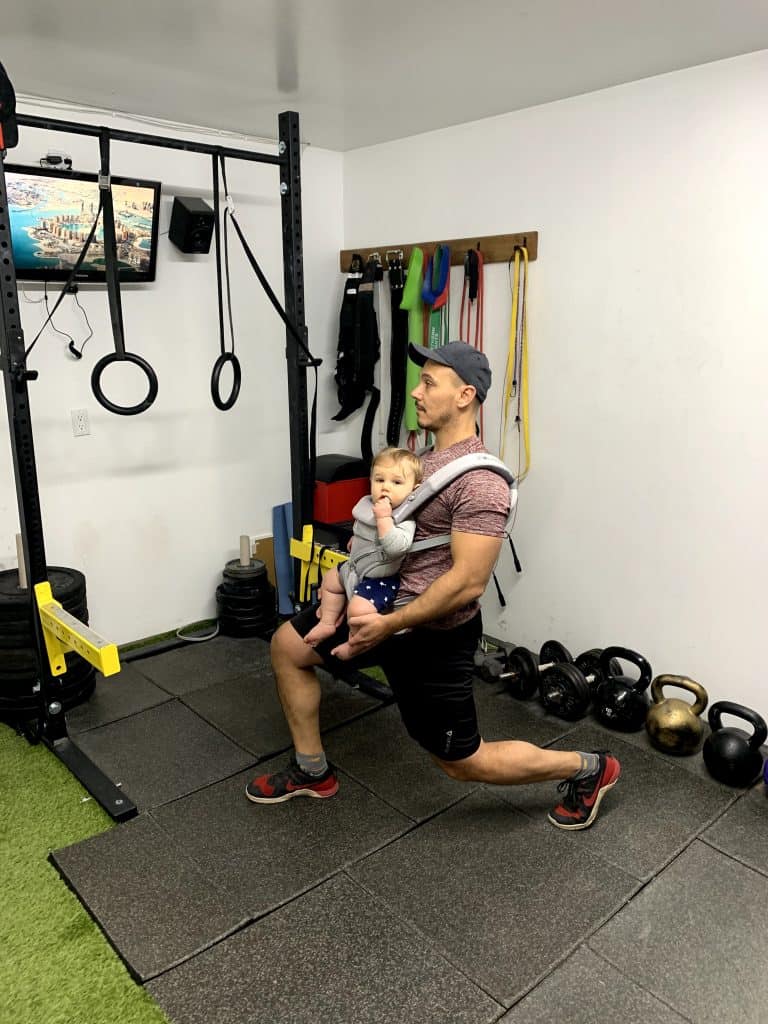
Lunge technique
The lunge should be completed while keeping the torso upright and the weight evenly divided between the rear and the front foot. The front foot remains flat and the rear foot is bent with the weight on the toe area.
Because the weight of the baby will pull you forward, you will need to focus on keeping the rear leg loaded and activated as you move forward and then down.
When standing up, the front leg should be pushed up until it’s straight and then slid backwards to meet the rear foot. The weight distribution should always remain as even as possible.
You should always try to make sure the forward knee does not bend beyond the toes. If you feel the knee is bending too much or your heels are lifting, take a larger step next time.
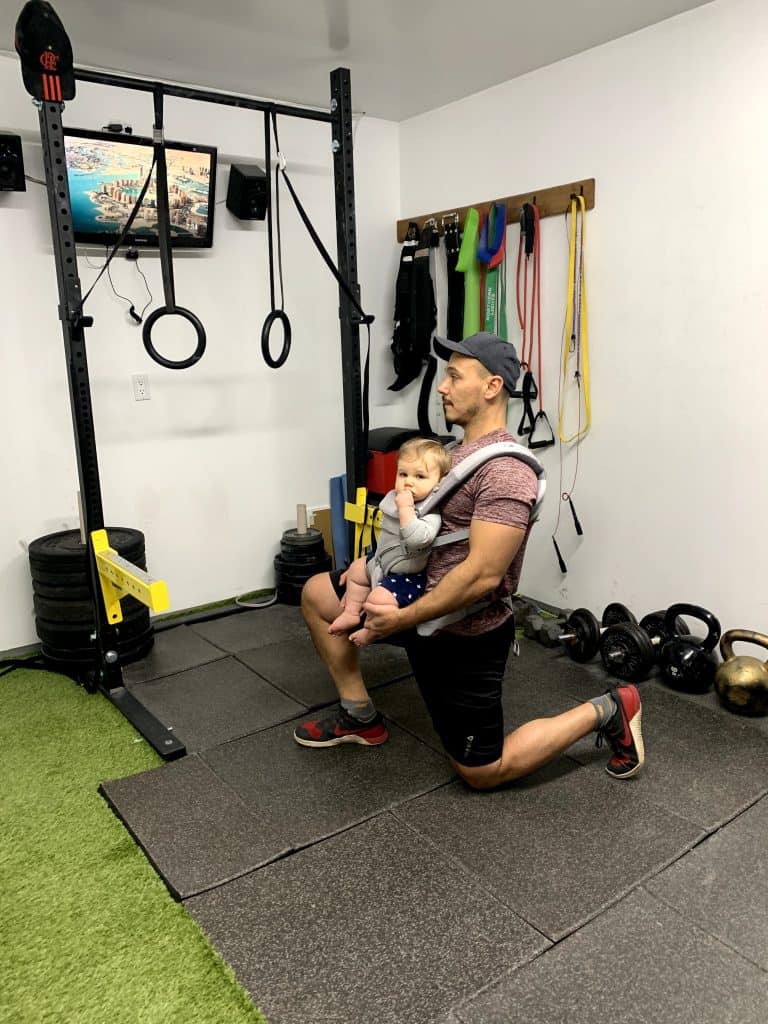
Babywearing tips for the lunge
Some special tips for the babywearing lunge are to always check the position of the baby’s legs as you go down for the lunge. I like to guide the legs towards the inside of my thigh so that they don’t get stuck on top of my leg or go to the outside when they will force the baby’s hips open.
Find a comfortable spot for his legs and make sure they always stay in the same position.
Additionally, I like to have some sort of support nearby in case I lose my balance and need to hold onto something. A pull up rig, a door, a wall or even a chair will do. Have something in arm’s reach just in case, especially as you attempt this the first time.
Scaling the lunge for babywearing
For scaling the lunge, I suggest adding some padding where your knee will bend to the ground. This will not only allow for a softer landing for the knee but can also work to reduce the range of motion.
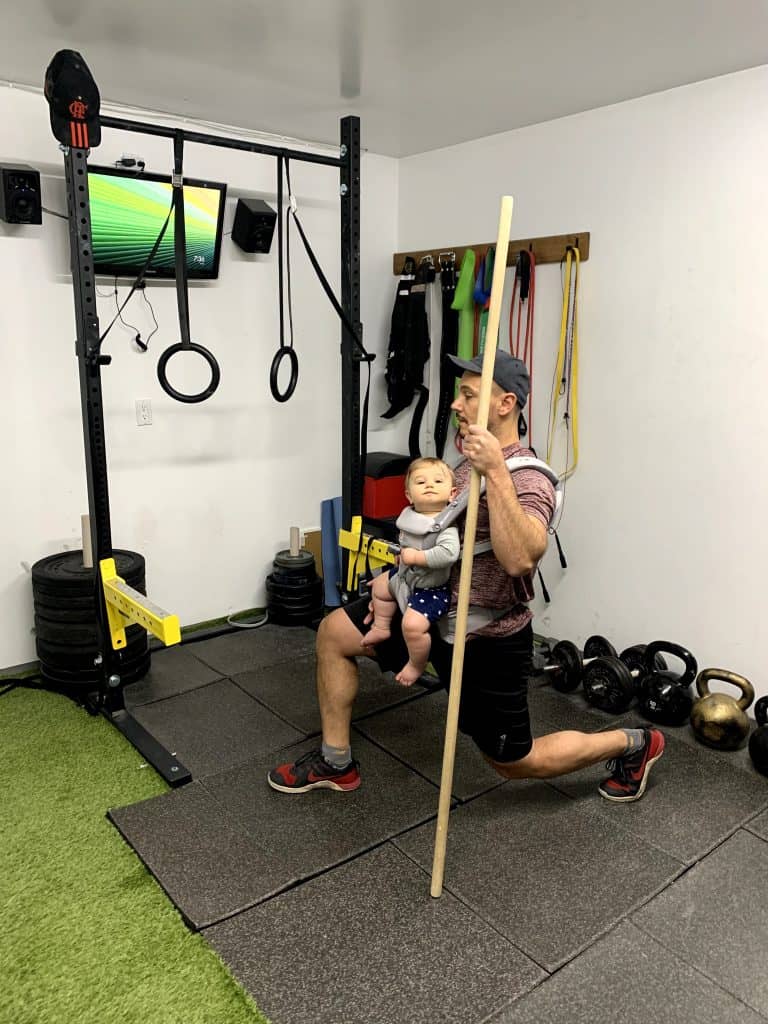
My other favorite scaling option for the lunge is to use a PVC pipe or wooden dowel to help you balance as well as help support the lunge as you go down and up. The dowel should be held on the same side as the rear support leg.
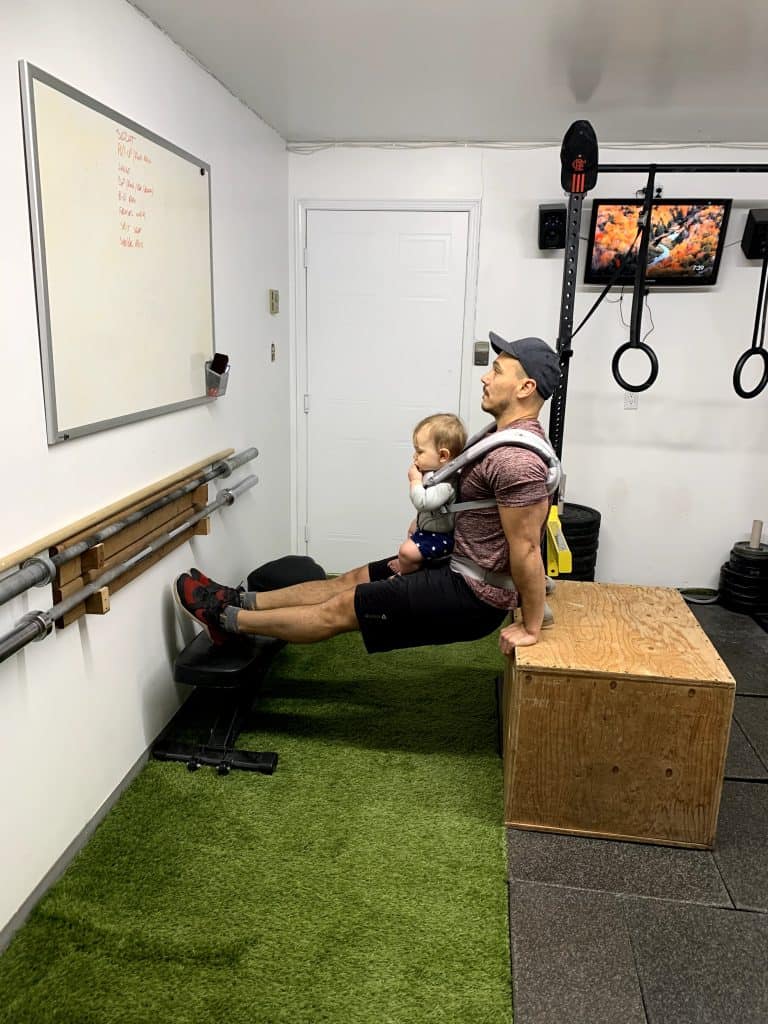
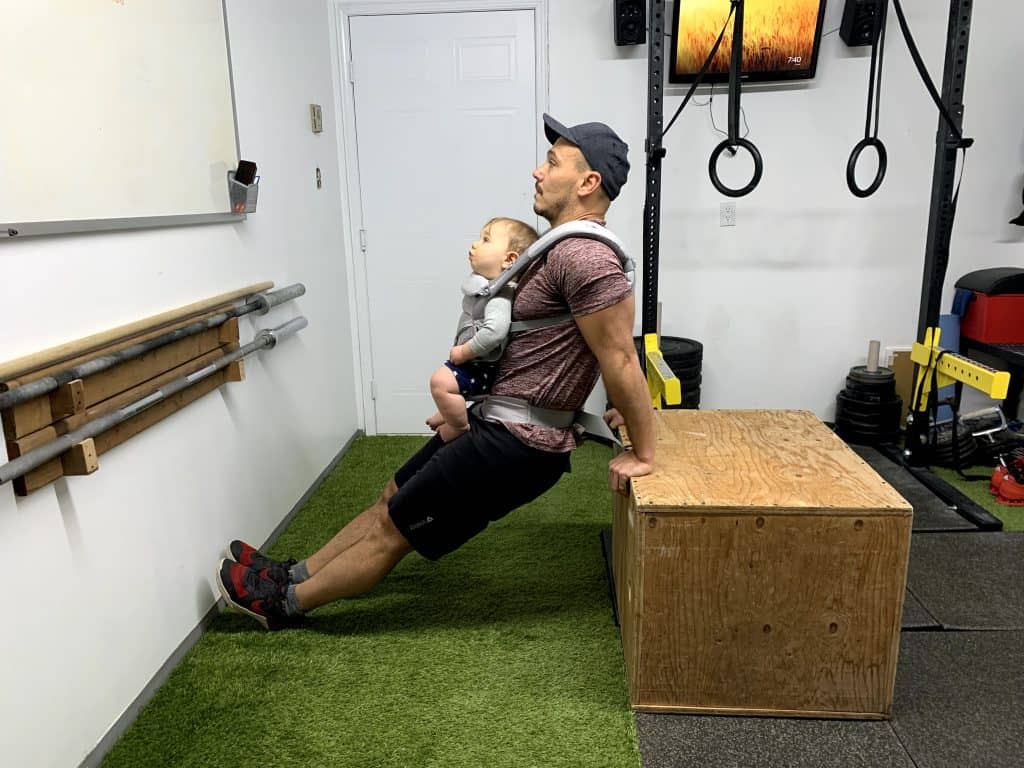
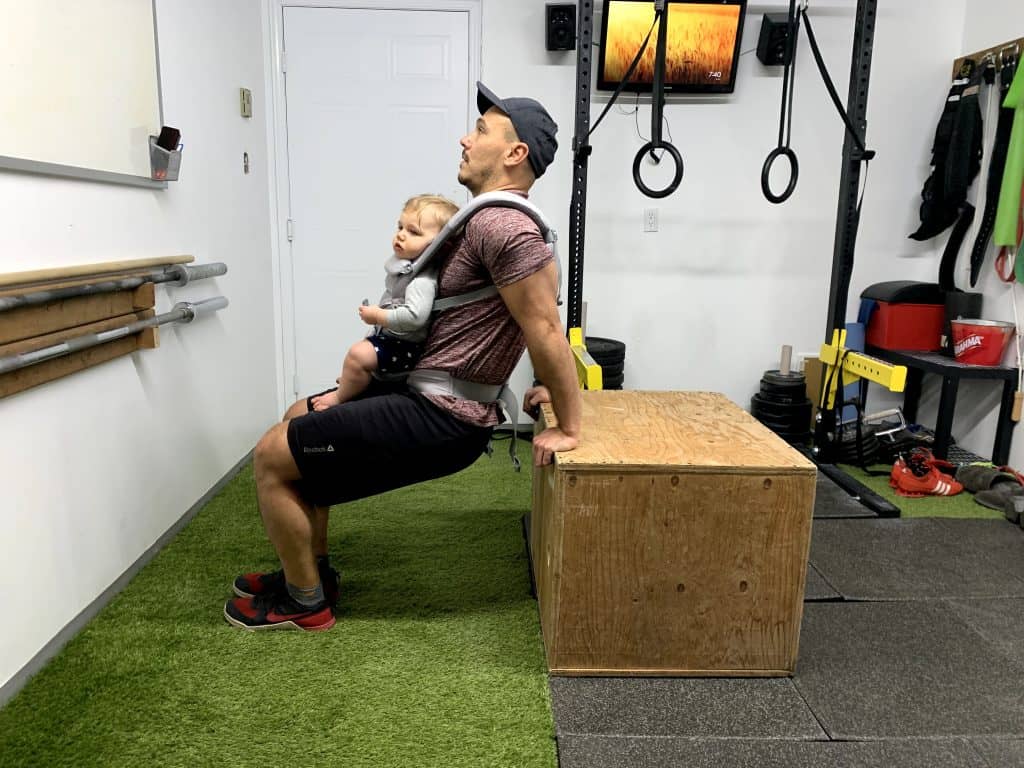
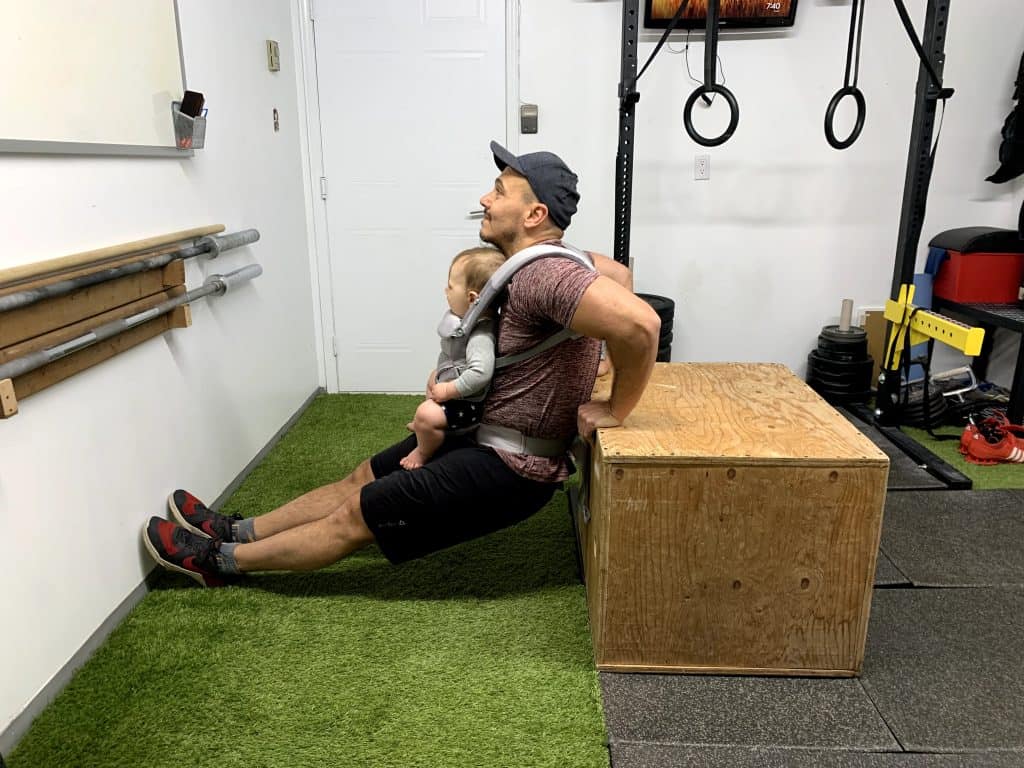
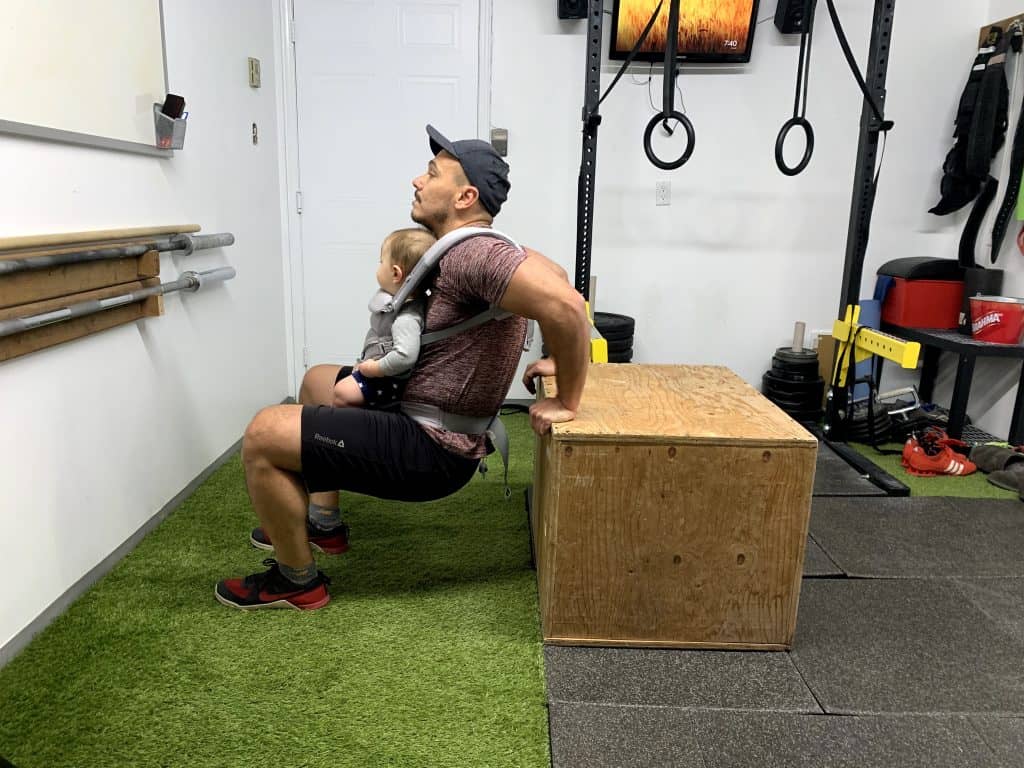
The babywearing dip
A dip is a more advanced movement that may require significant strength to perform, especially with the added weight and imbalance of carrying a baby. However, this does not mean that it can’t be modified to suit your needs. There are many ways to scale down the difficulty of the dip so that anyone can do it.
A standard dip is performed on parallel bars or rings, but the modified versions can be done on a box, bench or even a couch.
Dip technique

For the purposes of explaining the technique, we will use the bar or ring dip as the example. The modifications will be explained in the next sections. Using a fixed bar is significantly easier than the rings so if you have never tried a ring dip, do not attempt it the first time while baby wearing.
The dip focuses on the arms and shoulders and require some flexibility to perform in full range of motion. The movement starts at the top with the arms straight and legs hanging. As you lower your body in a controlled fashion, your elbows should remain close to the body and pushed against you. If your strength and flexibility allows, you should let your shoulder dip below your elbow and then push yourself back up.
Babywearing tips for the dip
The dip is a medium to advanced exercise that requires significant strength to perform correctly. If you are not able to perform at least 8 to 10 strict bar dips without any added weight, I would not suggest trying it with a baby strapped to you. Instead you can try one of the scaling options below.
If you are comfortable performing this movement with a baby carrier, you should always check that the bar or rings are wide enough that they won’t touch the baby anywhere throughout the movement. The distance of the ring straps are adjustable but most bars are not so if you feel there is any danger that any part of the baby may hit the bars, do not use them. If you are using rings, make sure the straps are out of the way and remain to the outside of your body.
I also like to place the rings low enough to the ground that I don’t have to jump up onto them or down when finishing a rep. This means that there wont be any unnecessary impact to the baby when mounting and dismounting.
Scaling the dip for babywearing
If you are need to modify this movement, the best options are to use a box, bench or couch. Even though some people use a chair, I would not suggest it especially when you have a baby attached to you. Chairs can be wabbly and may not be able to support the weight safely.
On the box/bench/couch dip, you will place your hands on the edge with the palms down and the goal as before is to always keep your elbows tucked in. Don’t let them flare out and this will put a lot of strain on your shoulders by internally rotating them.
Keep your back close to the box as you go down and then push yourself back up.
To further scale this movement, bend your knees and help yourself up slightly with your legs taking away the weight from the arms. To scale this up to make it more difficult, you may raise your feet up on another surface. Play around and find a position that feel challenging but that you can still perform multiple reps without reaching muscle failure.
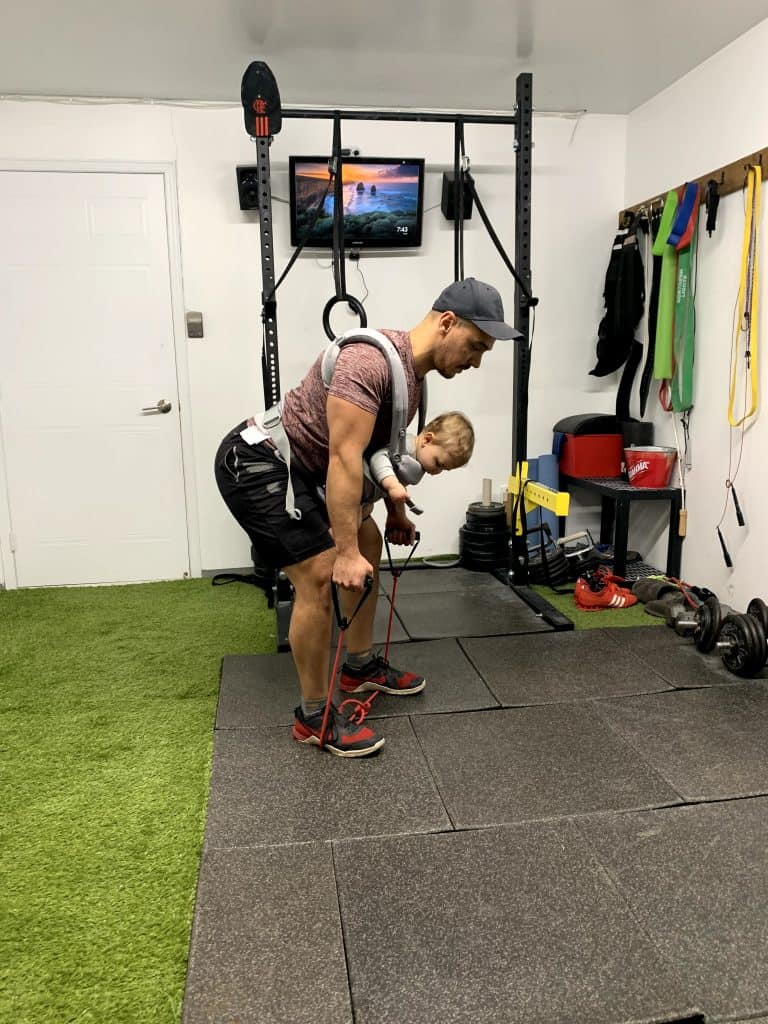
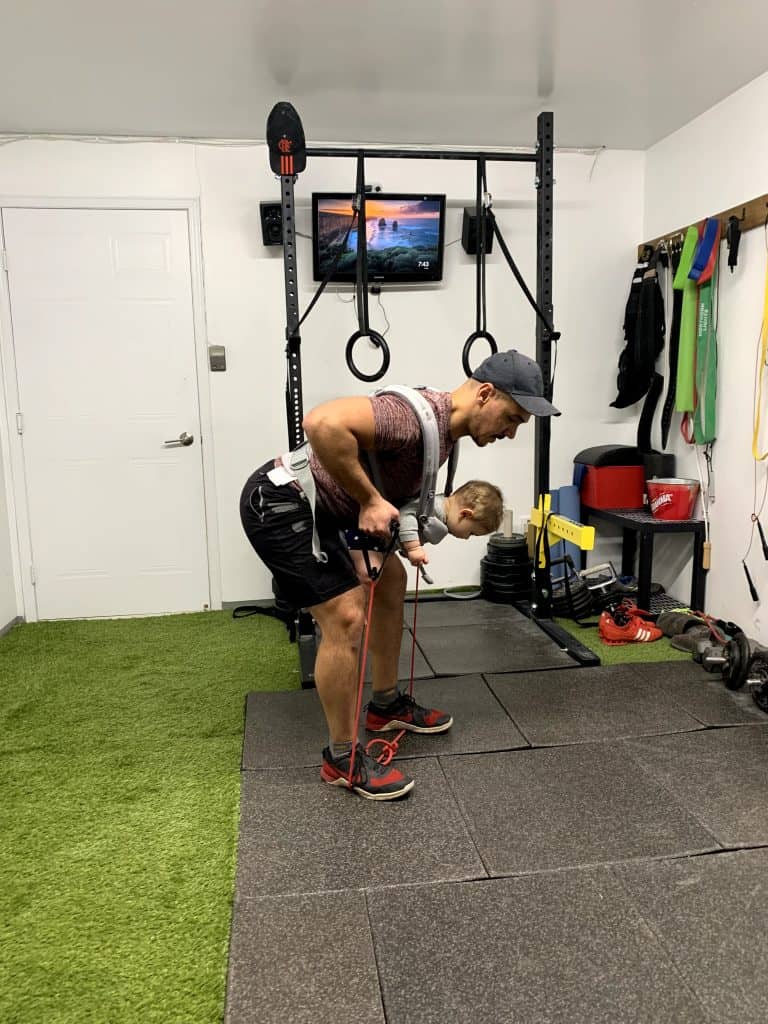
The babywearing bent over row
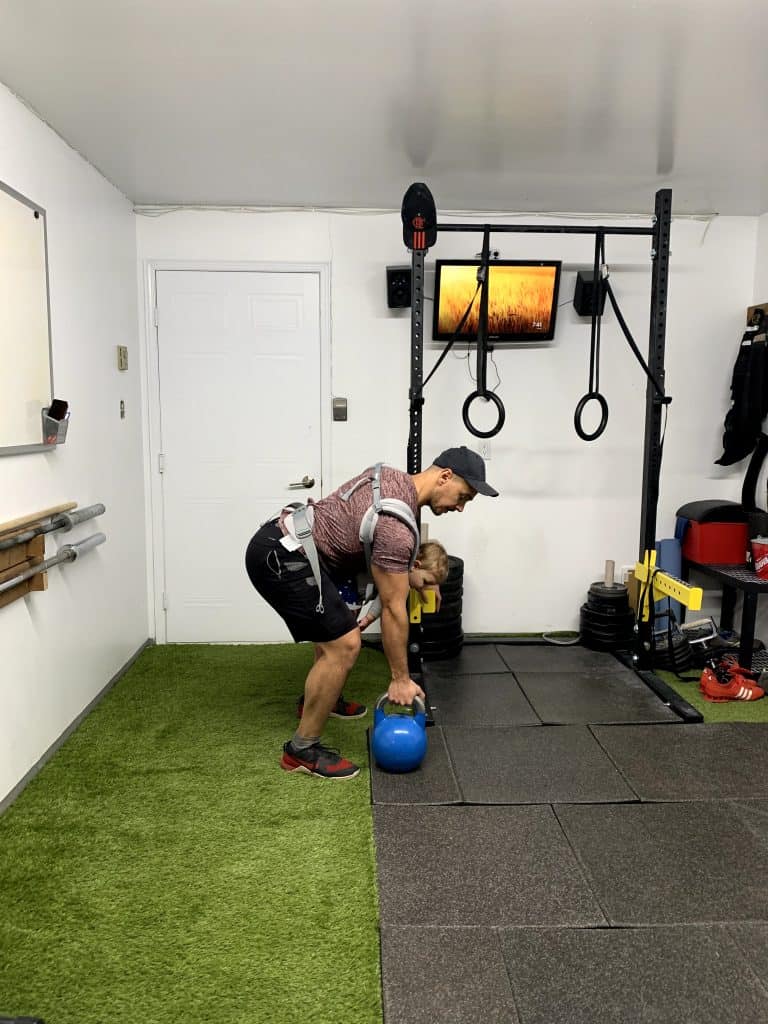
The bent over row is a great exercise that targets primarily the back and shoulders but also engages essentially the entire body. Due to the bent over position of the body, you will also engage your glutes, hamstrings and really the whole posterior chain.
This movement will be affected slightly by babywearing but it is still safe to do and you can get a great pump from it too!
Even though this exercise can normally be done with a barbell, my suggestion for performing this while babywearing is to stick with dumbbells, elastics or my favorite for this one, the kettlebell.
Bent over row technique
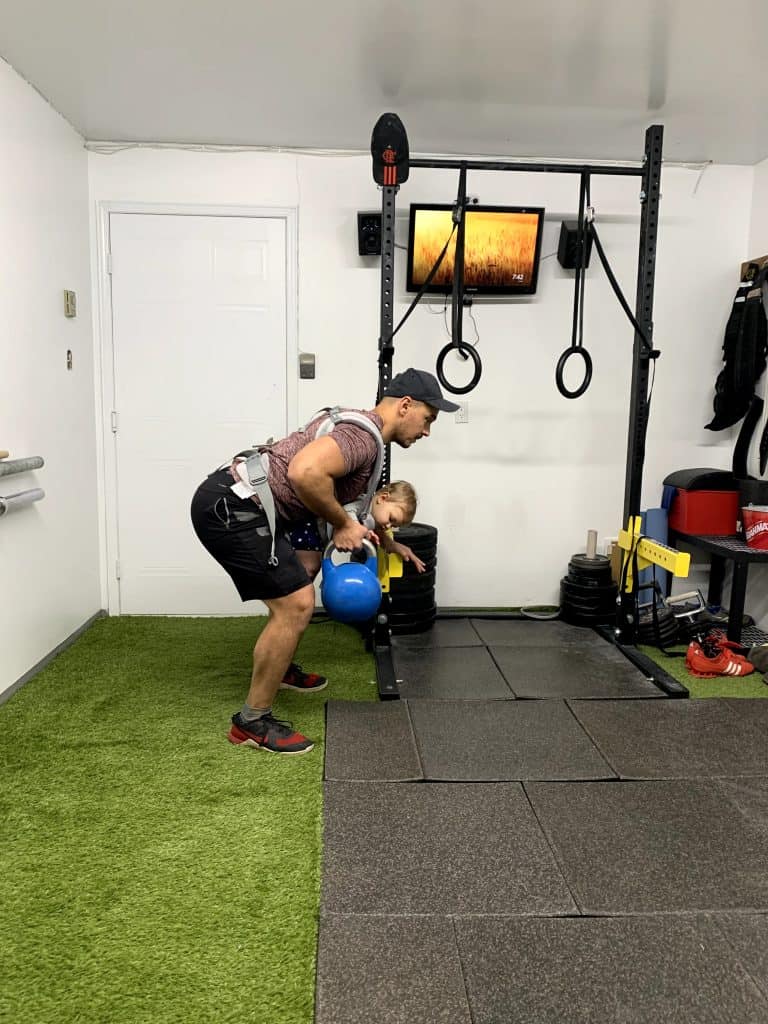
For the bent over row to be performed correctly, the shoulders should be pulled back, the back straight and the hamstrings engaged. The upper body is leaning forward but not so much that it’s parallel to the ground. Your bodyweight is distributed throughout your feet and your heels are planted down.
The weight is pulled towards your rib cage, somewhere in the middle between your nipples and your bellybutton. The palms can be faced forward, backwards or towards each other to engage the muscles slightly differently.
The upper body should not move up and down as you pull the weights, keep it tight.
Babywearing tips for the bent over row
If your baby is old enough to be faced forward in the baby carrier and strong enough to hold his head up on his own, you don’t need to worry about the forward hanging position. Otherwise, I would suggest that the baby is facing you and the head and neck are very well supported by the carrier. A newborn friendly carrier or a sling may be idea for a younger baby.
If babywearing, I like to stay away from the barbell row and stick with dumbbells, kettlebells or even an elastic band. The kettlebell is my favorite because the bulk of the weight is actually lower and it allows you to pull the handle high without bringing the weight itself too close to the baby.
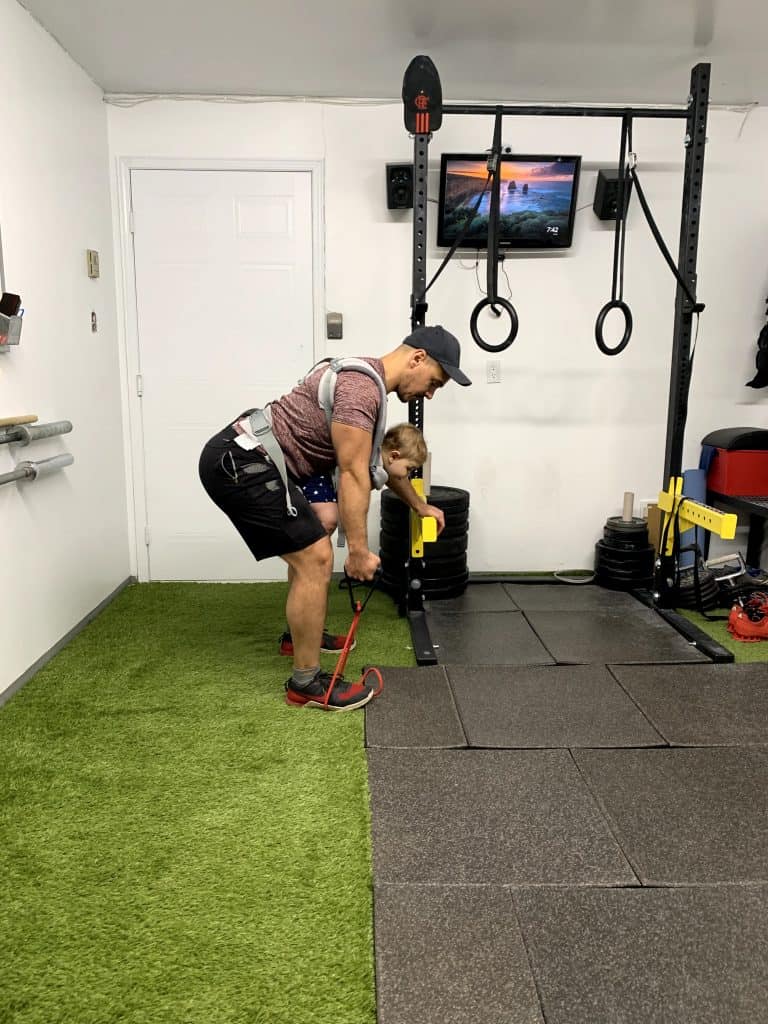
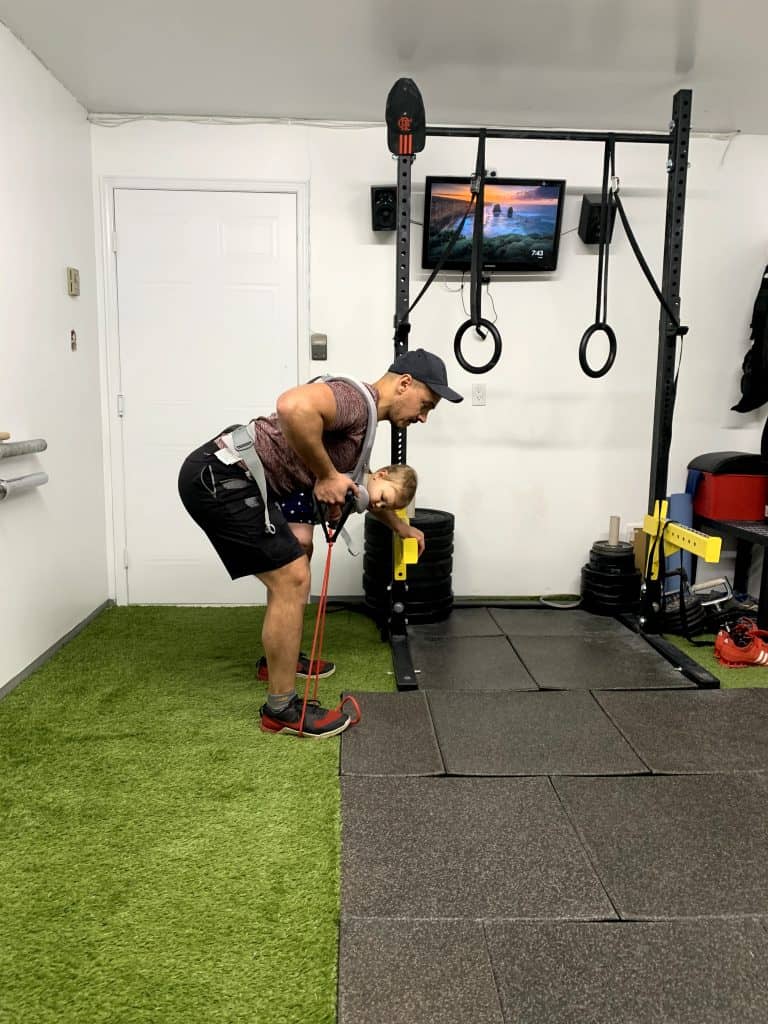
An elastic band is also a great option because it doesn’t interfere with the baby at all and as a bonus it increases in difficulty as you pull it making it very challenging.
I like to perform the bent over row very slowly and controlled both on the way up and down and also keep the reps fairly low so we can give baby a break from the hanging position. I try to stay below the 15-rep mark.
Scaling the bent over row for babywearing
For scaling you may change the weight to suit your strength level. This is not a competition for heighets weight. Focus on engaging the right muscles and keeping good form especially because the weight of the baby will pull you forward.
I also like to do single arm rows and support my upper body with the other arm. This technique ensures that I keep my body straight and don’t swing up and down while pulling the weights.
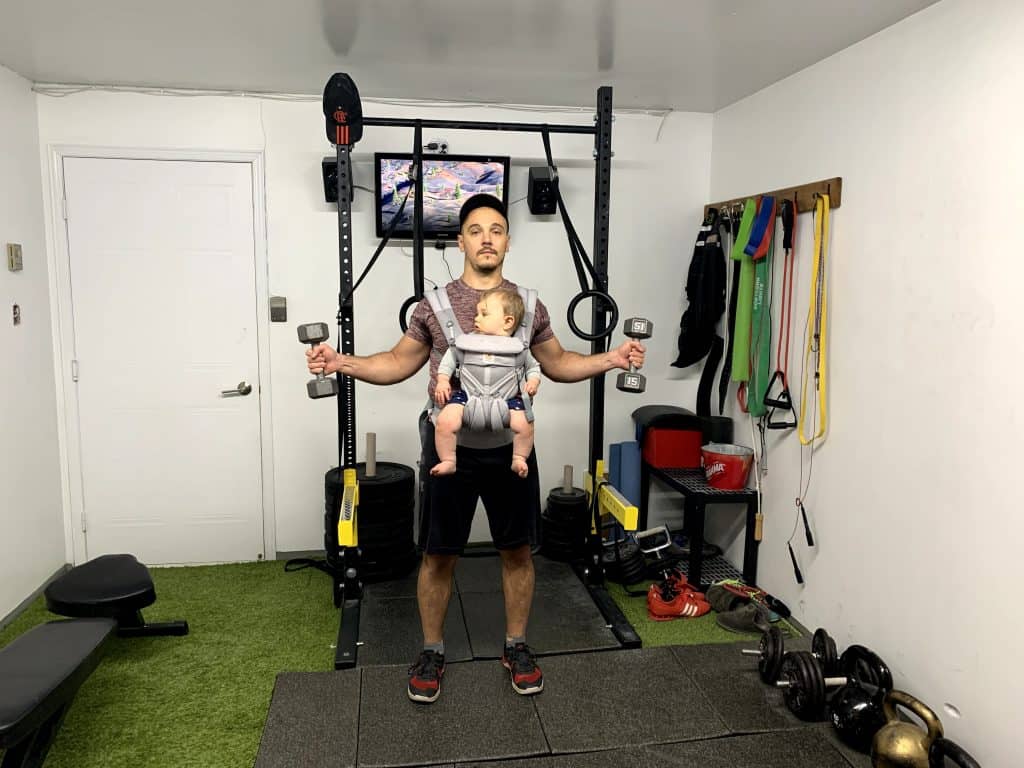
The babywearing farmer’s walk
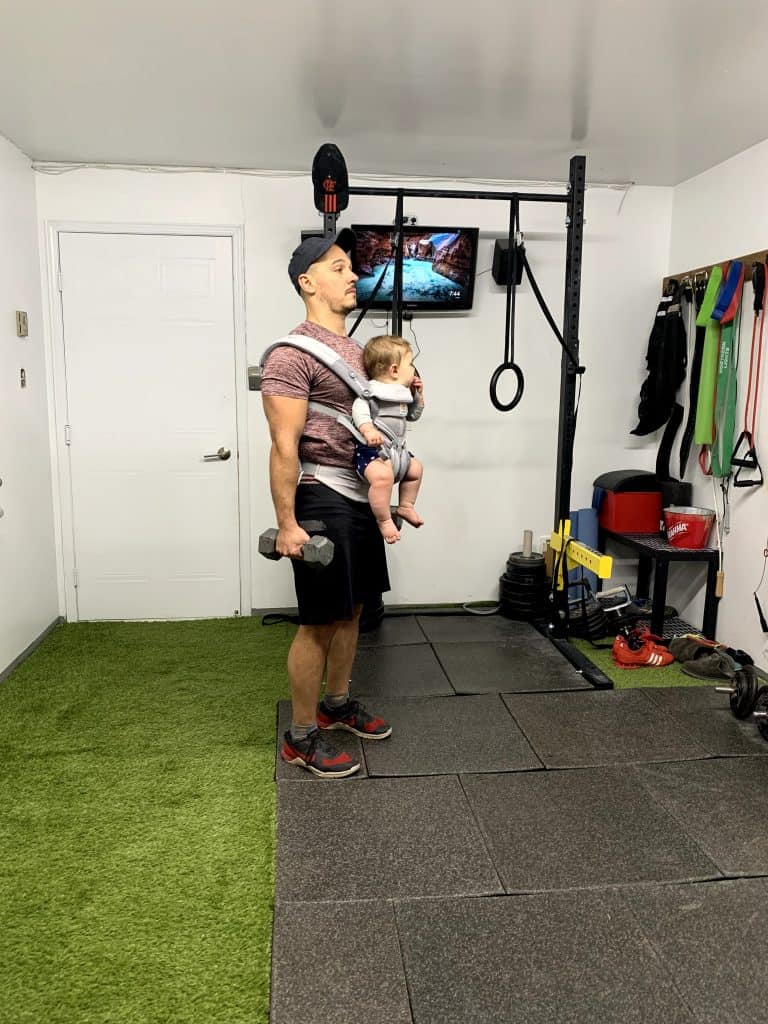
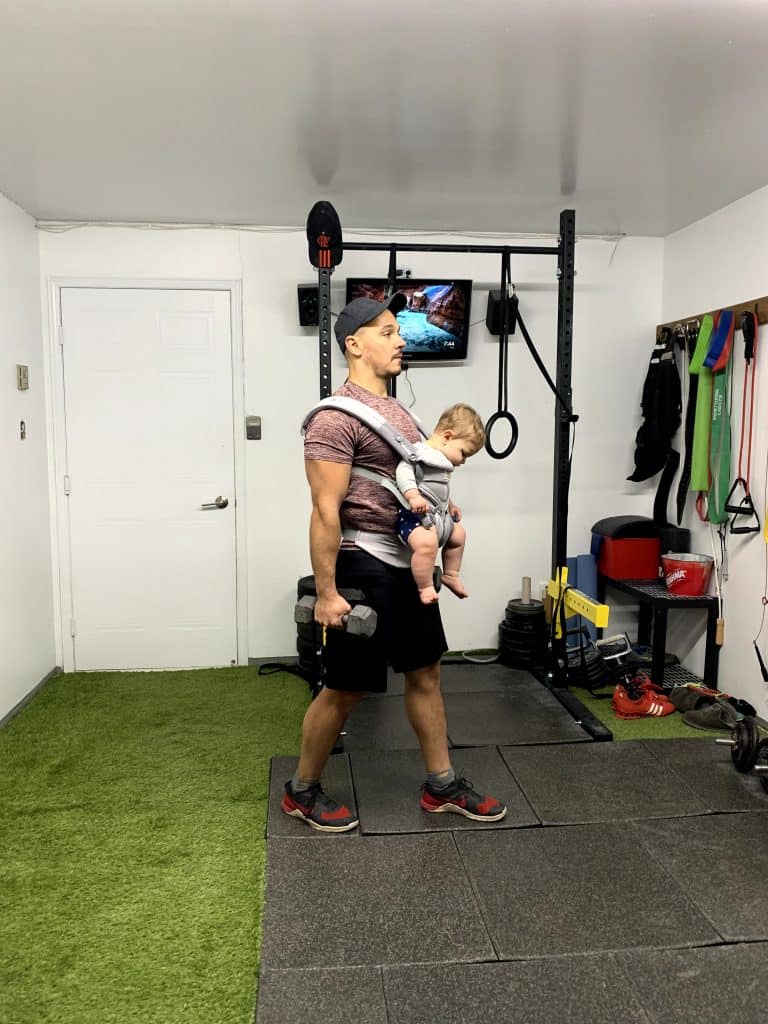
A farmer’s walk is simply a walk while holding additional weight on each hand. Let me emphasise walk; not run. The weight can be anything from water jugs to dumbbells, kettlebells bags of rice or anything you have laying around.
Try to use accessories of similar size and weight but if you don’t have two of the same you can still do it. Just perform the walks and then switch half way or do one round and then switch next round.
Remember that you will have the added weight of the baby already so don’t go too heavy with the weights you are holding.
Farmer’s walk technique
While holding the weights on each hand make sure that your core is always engaged, the arms are straight and the shoulders are pulled back. You don’t want the weight to pull your upper body forward so slightly puff out the chest while keeping the core engaged so that you don’t over-extend the spine.
When walking, try to keep the weights from swinging too much and always be in control of your motion. Do NOT move too fast, the purpose is to focus on each step.
Babywearing tips for the farmer’s walk
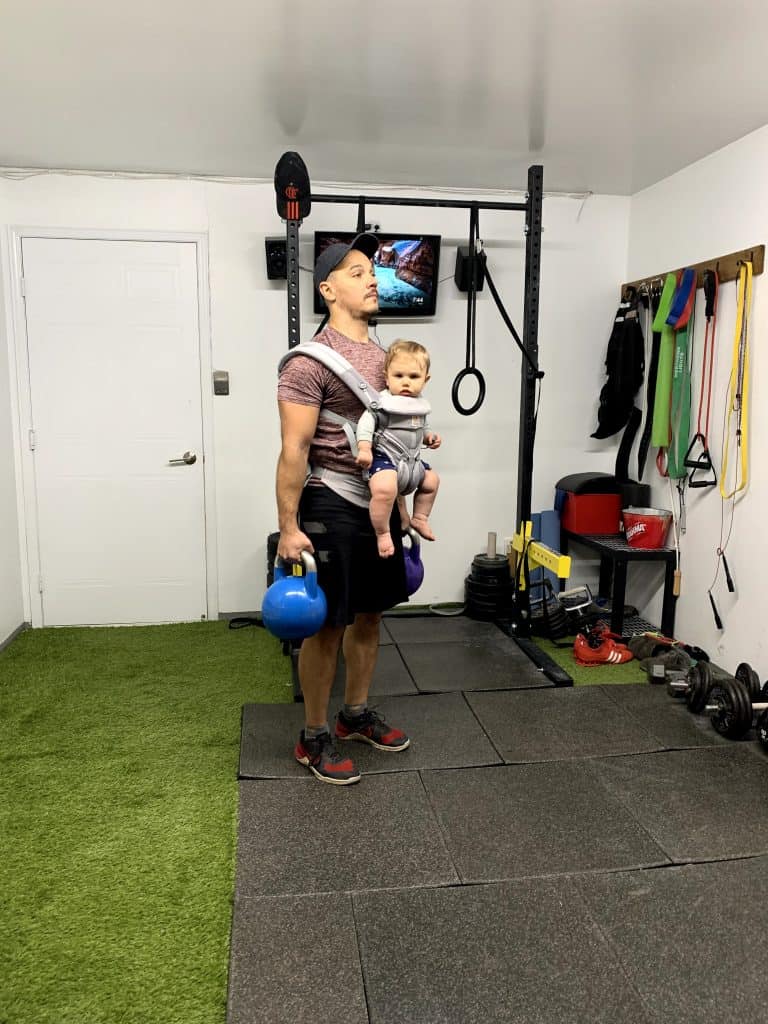

I like to place the weights on a raised surface such as a box or bench to allow for easy reach while babywearing. It’s not always easy to bend over to the floor and pick up a weight with your baby strapped to you so set the weights up for easy access.
Also, really focus on keeping your core engaged throughout the walk during each step. The weight of the carrier in combination with the weights you are holding will have a tendency to pull your shoulders down and forward. Keep tight and as straight as possible.
Scaling the farmer’s walk for babywearing
Since the purpose of the farmer’s walk is to increase the weight and strain on walking, it’s possible that you don’t need more weight than what your baby already adds. In that case, simply walk with the baby carrier!
If you just want to add a bit of extra weight you can use small 5lbs dumbbells or even other weighted objects you have lying around the house such as bottles filed with water.
The babywearing split squat
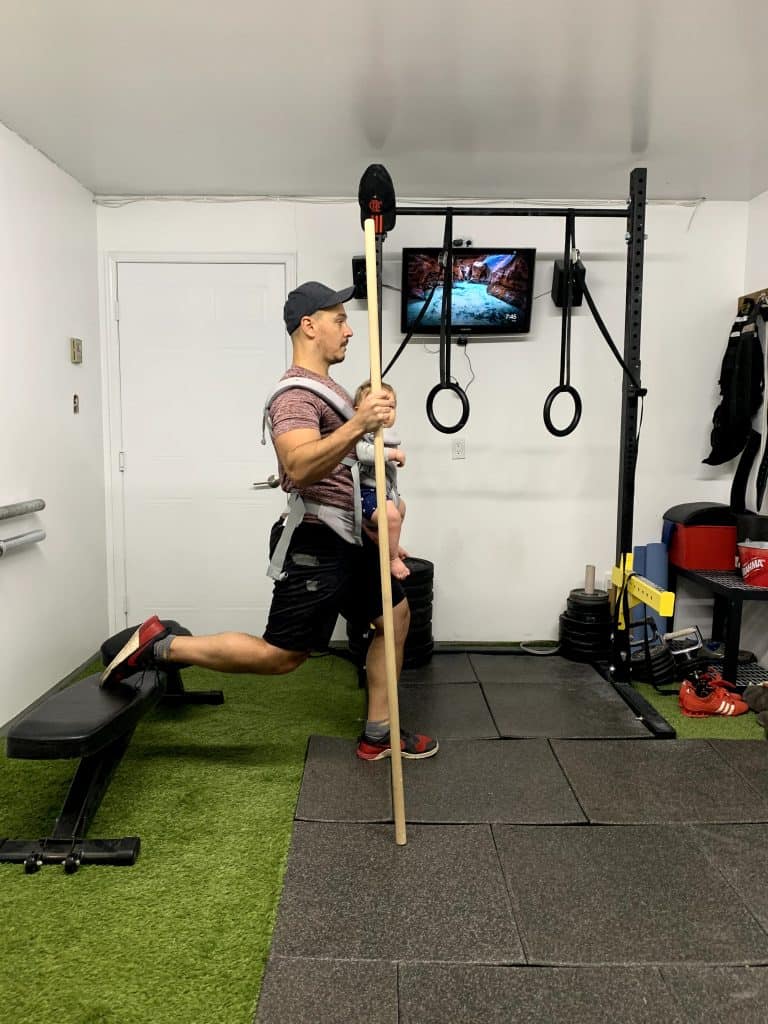

The split squat (or Romanian split squat) is a form of lunge where the rear foot is elevated. This is a more advanced movement that could be challenging even without the added weight of your baby so please try this without babywearing before doing it with the baby if you have never performed this movement.
The split squat targets the entire leg, posterior chain and core. Given that there is a balance element to this exercise, it is strongly advised that you use some sort of support while doing this. I like to use a wooden dowel or PVC pipe but you can also use a fixed structure for better support.
Split squat technique
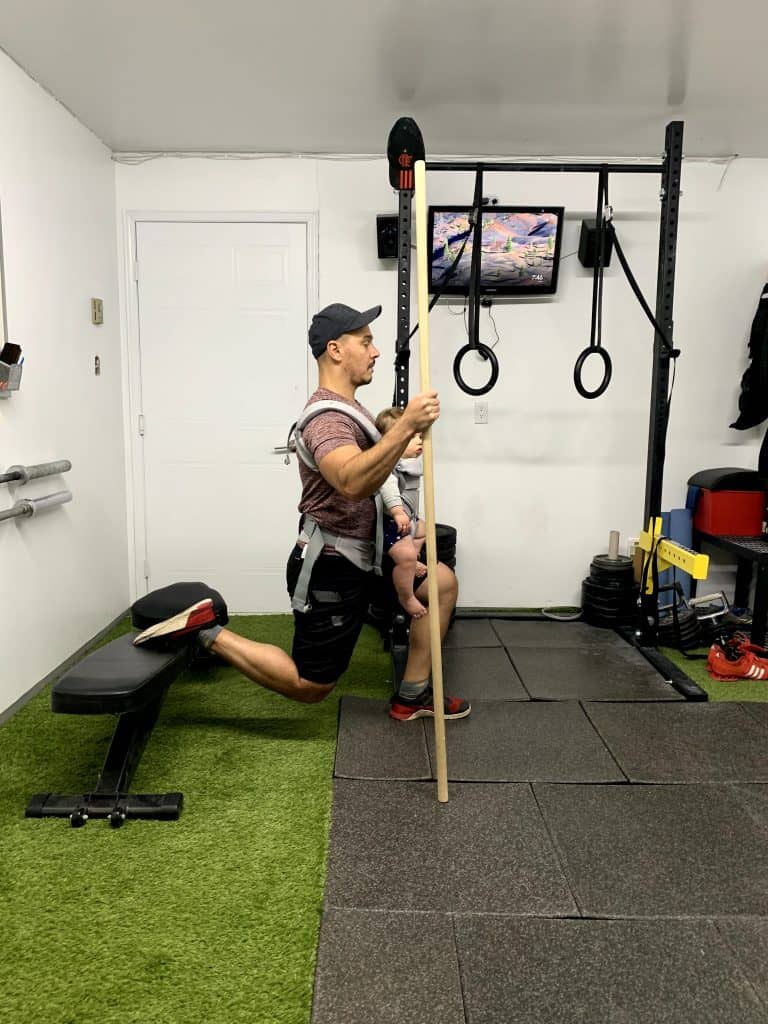
With the top of your rear foot resting on a relatively low surface such as a bench, chair or couch you will go down in a lunge until the rear knee touches the ground or until your flexibility allows. It is important to only go as low as you can while keeping your torso fully upright.
If you have tight hips or lack hip flexibility you will notice that you will have a tendency to lean forward as you lower yourself. In this case, make sure to not continue to descend and instead bring yourself back to a standing position.
If you are able to go low enough to touch your rear knee to the ground you will want to have your front foot at a position where your leg is at about a 90deg angle. If you notice your knee going far forward beyond your toes, move your foot forward so the knee is at approximately 90deg.
Babywearing tips for the split squat
The first and most important tip is that you must have something to hold onto. There is no room for error with a baby. Since you will be supported on one leg you must have something to hold onto in case you lose your balance.
Use a stick or a fixed post (or door) for balance and make sure you are able to easily drop the rear foot to the ground to regain balance if needed.
Before starting the workout set up your foot position for correct form as described above (90deg angle for the front leg) and use a marking on the ground to keep your foot in the correct location for each rep and set.
Scaling the split squat for babywearing
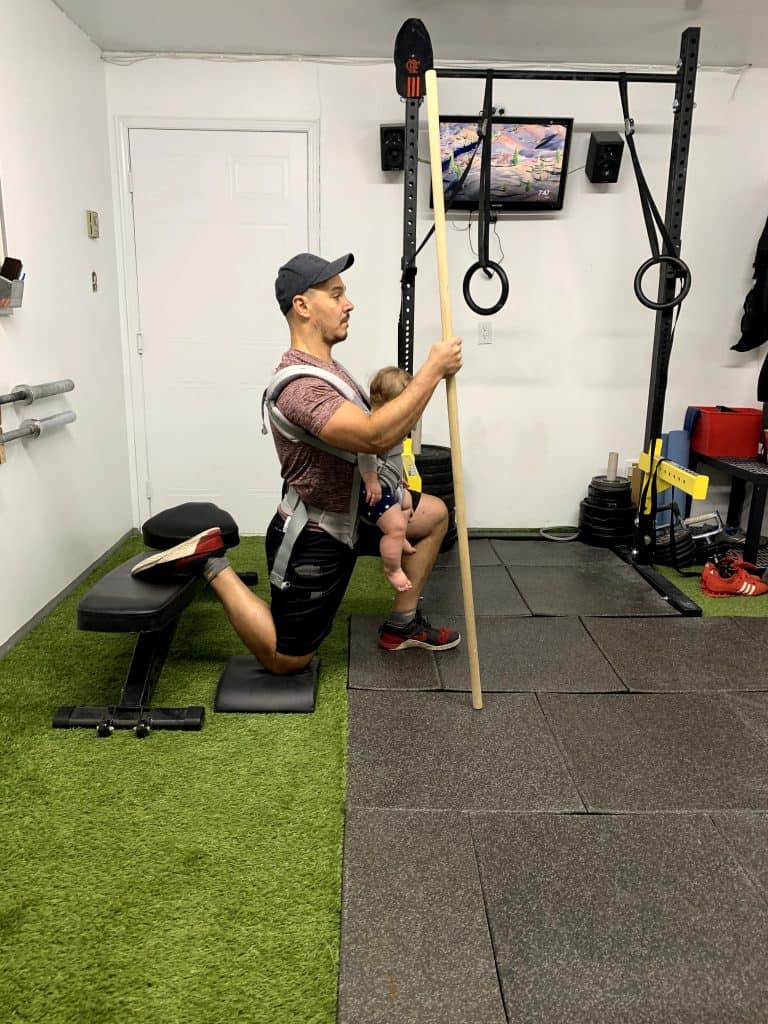
For scaling options, you can adjust the height of the rear foot as needed. I like to use towels to raise it higher if needed. You may also use towels or a yoga block as a target for you knee in case you are not able to touch the ground or feel you are losing form as you go too low.
Additionally, you should use your hands as support to pull yourself up from the bottom if you find the added weight of the baby is making it difficult to perform multiple reps
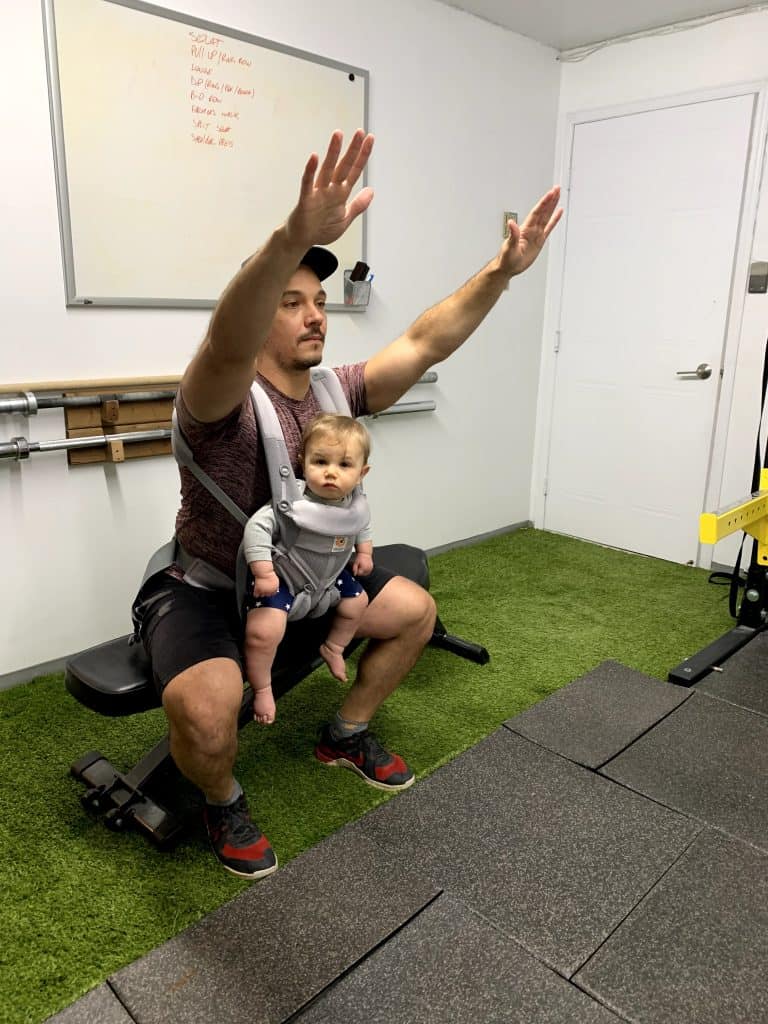
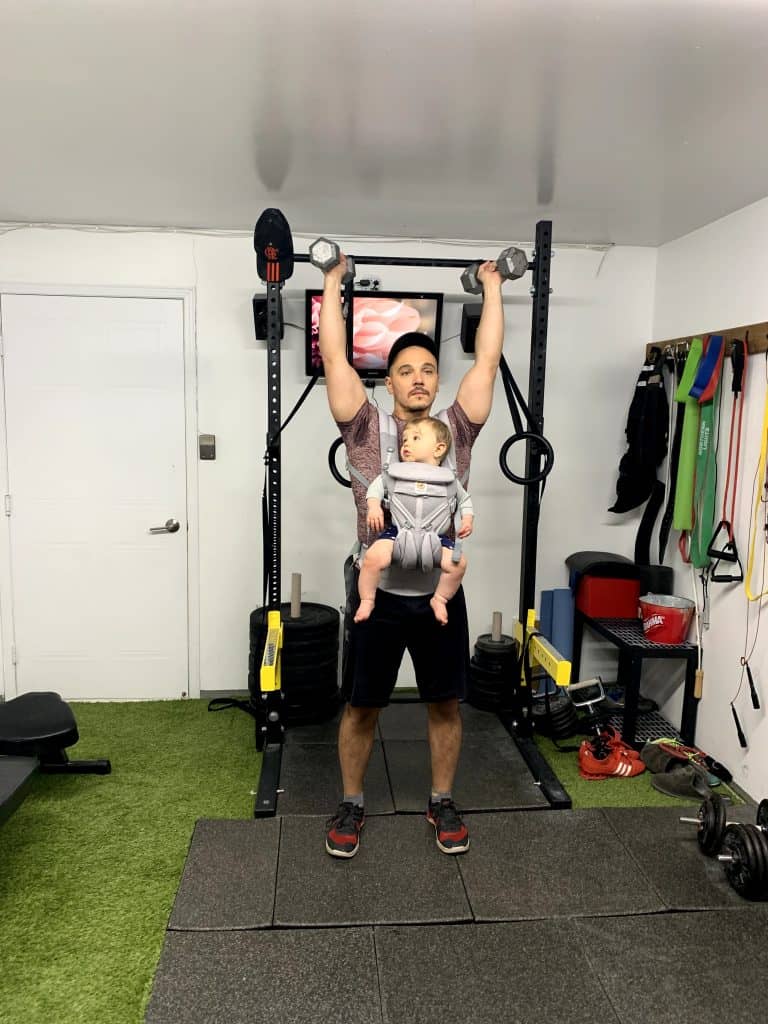
The babywearing shoulder press
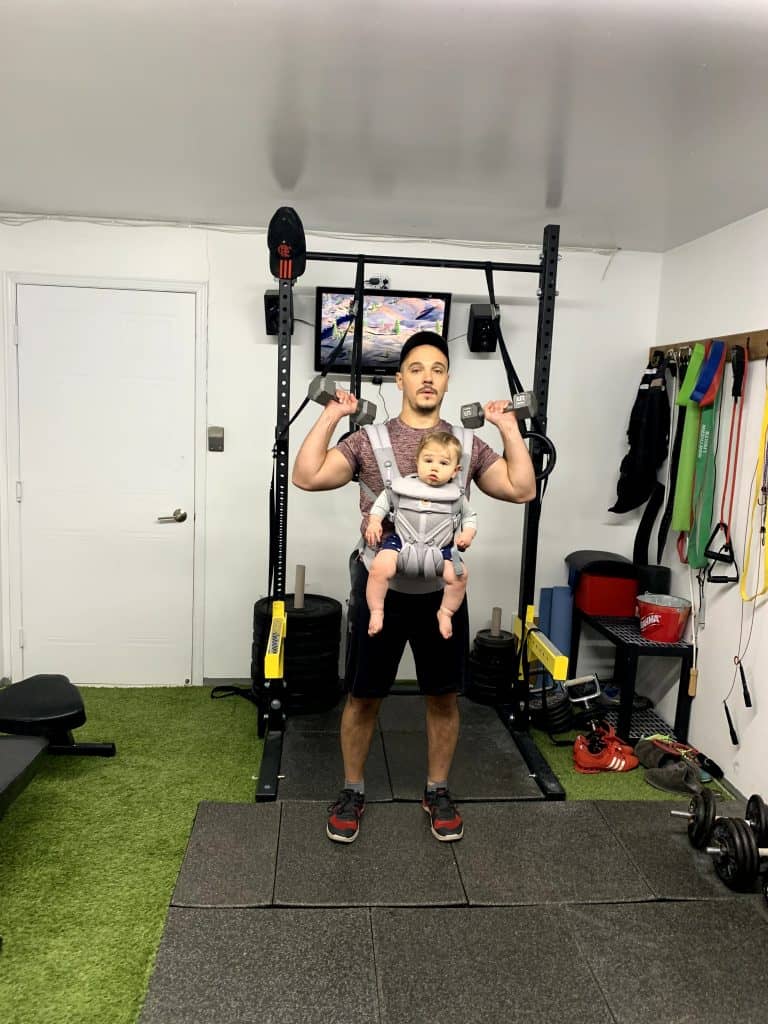
The shoulder press or military press can be performed while seated or standing, single arm or both at the same time. I prefer to do it standing in order to engage the whole body as you do the movement.
This exercise consists of pressing any kind of weight or load from your shoulders to an overhead position with the arms fully extended.
The press can normally be done with a barbell but we will stay away from this version while babywearing. For the purposes of this guide we like to use dumbbells, kettlebells or elastic bands.
Press technique
The shoulder press targets mainly your shoulder and arms. When doing the shoulder press you should always keep your core and lats engaged, ensure your torso is straight and keep your elbows tucked in. Flaring the elbows will cause the shoulders to internally rotate and it will put unnecessary pressure on it.
The press starts with the hands at shoulder height, continuing until the arms are fully extended and ending with the hands back at the starting position.
Babywearing tips for the should press
In order to do the press correctly and safely while babywearing you need to always beware of the baby’s body, limbs and head position. The weights used MUST be light, so if you’re looking to get a good pump I suggest going for high reps.
The weights should always go up to the shoulders from the side and not the front. The same goes for putting the weights down once the set is over. Keep it on the sides!
If you have a mirror, do the reps and you watch the weights and your baby. As you press your arms up you will notice that the baby carrier will raise, so make sure that the baby is still comfortable even when your arms are all the way up. You can try it without the weights first and re-adjust the carrier as needed.
Scaling the press for babywearing
My favorite way to scale the press is by using an elastic band instead of weights. Step on the elastic band with both feet and pull it up from the sides ensuring it remains on the outside of your arms. The beauty of the elastic band is that the load increases as you stretch it so it gets tougher as you press.
The other obvious way is by simply doing it with less weight. Choose a weight that you are very comfortable with and try it out.
Stay safe, consistent and keep it fun
Safety is THE most important aspect of doing any kind of exercise with your baby strapped to your chest. Before starting your babywearing workout:
- Check your surroundings for any tripping or falling hazards
- Check that the baby is comfortable in the carrier
- Try out each exercise for a few reps and check that the baby is comfortable in the carrier before starting the workout
- Move slowly during and in between exercises
- Do NOT push yourself too hard. Keep intensity to a level where you feel challenged but are still able to speak normally
- Reduce the range of motion of any exercise you do not feel 100% comfortable with
- Stop the workout if you feel too tired or light headed in any way.
As with any kind of sport or fitness endeavour, consistency is key. In order to stay consistent, it’s important to enjoy what you’re doing by keeping it fun. One of my tricks for consistency is to get creative with each workout and mix up different exercises in as many ways as imagination allows.
Change the rep scheme, time limits and the number of exercises you are doing each day. There are countless variations that you can come up with to change up the workout and challenge yourself in different ways while still babywearing.
Now get out there and give it a try!

Paul is a passionate dad who founded Upside Dad to share his parenting journey with other new parents. He graduated from Concordia University and worked as a test engineer for over a decade. Paul loves dad jokes and craft beer.
Learn more about Paul and Upside Dad here.